
Because I was an Oracle DBA by trade—and everything was command line driven—it was confusing at the time to understand the commands and purpose behind each process.
In addition, in choices like classic mode vs. integrated capture and data pump vs. no data pump, there was a learning curve that clearly required a good understanding of its capabilities and key decisions before even beginning setup.
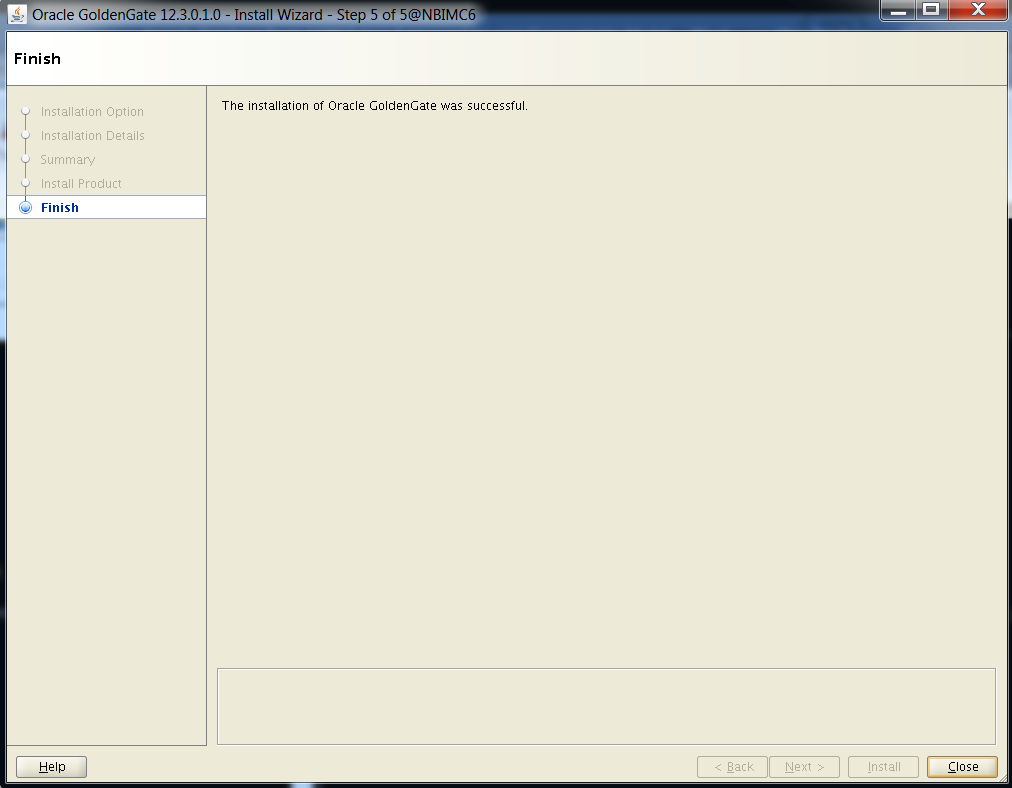
I recently learned that Oracle launched a new version of GoldenGate (12.3), so I figured I would capture this experience and make a blog out of it. After all, in doing my earlier research, there weren’t many (if any) blogs that walked through what I would consider a “normal” scenario.
“Normal” to me is a database on one server and another database on a different server. I went through this exercise with the standard Oracle GoldenGate 12.3.0.1.0 for Oracle on Linux and it’s not too different than what I’ve done before.
Boring!
If you are a diehard command line type and don’t want to use a GUI, here’s a good link that walks you through that process.
I decided to take on GoldenGate microservices. A GUI interface with new terms to learn? Different equals interesting. Challenge accepted...
For a detailed description of the setup with no pictures, please review this link. This provides the steps and more explanation of options, processes, etc.
Assumptions
I want to note a couple key assumptions before we get started.
- This write-up assumes you have a basic understanding of GoldenGate components. Perhaps you have previously used the old version and want to learn how to set things up using microservices.
- For simplicity, I chose the Integrated Capture mode because it’s the preferred path by Oracle.
- I’m assuming you have a couple databases to play with and don’t need help in setting these up.
- In this example, I went with a standard database configuration (not pluggable) because I didn’t want to make this overly complicated. This configuration will also provide the foundation for a more advanced configuration in future blog posts. I like to leverage the KISS principle when it comes to learning new capabilities and this provides a quick and dirty setup to get you going. In my scenario, it’s just one-way replication.
- The source database was not being used so no need to worry about capturing changes during the initial setup. There were no changes happening.
Key Components
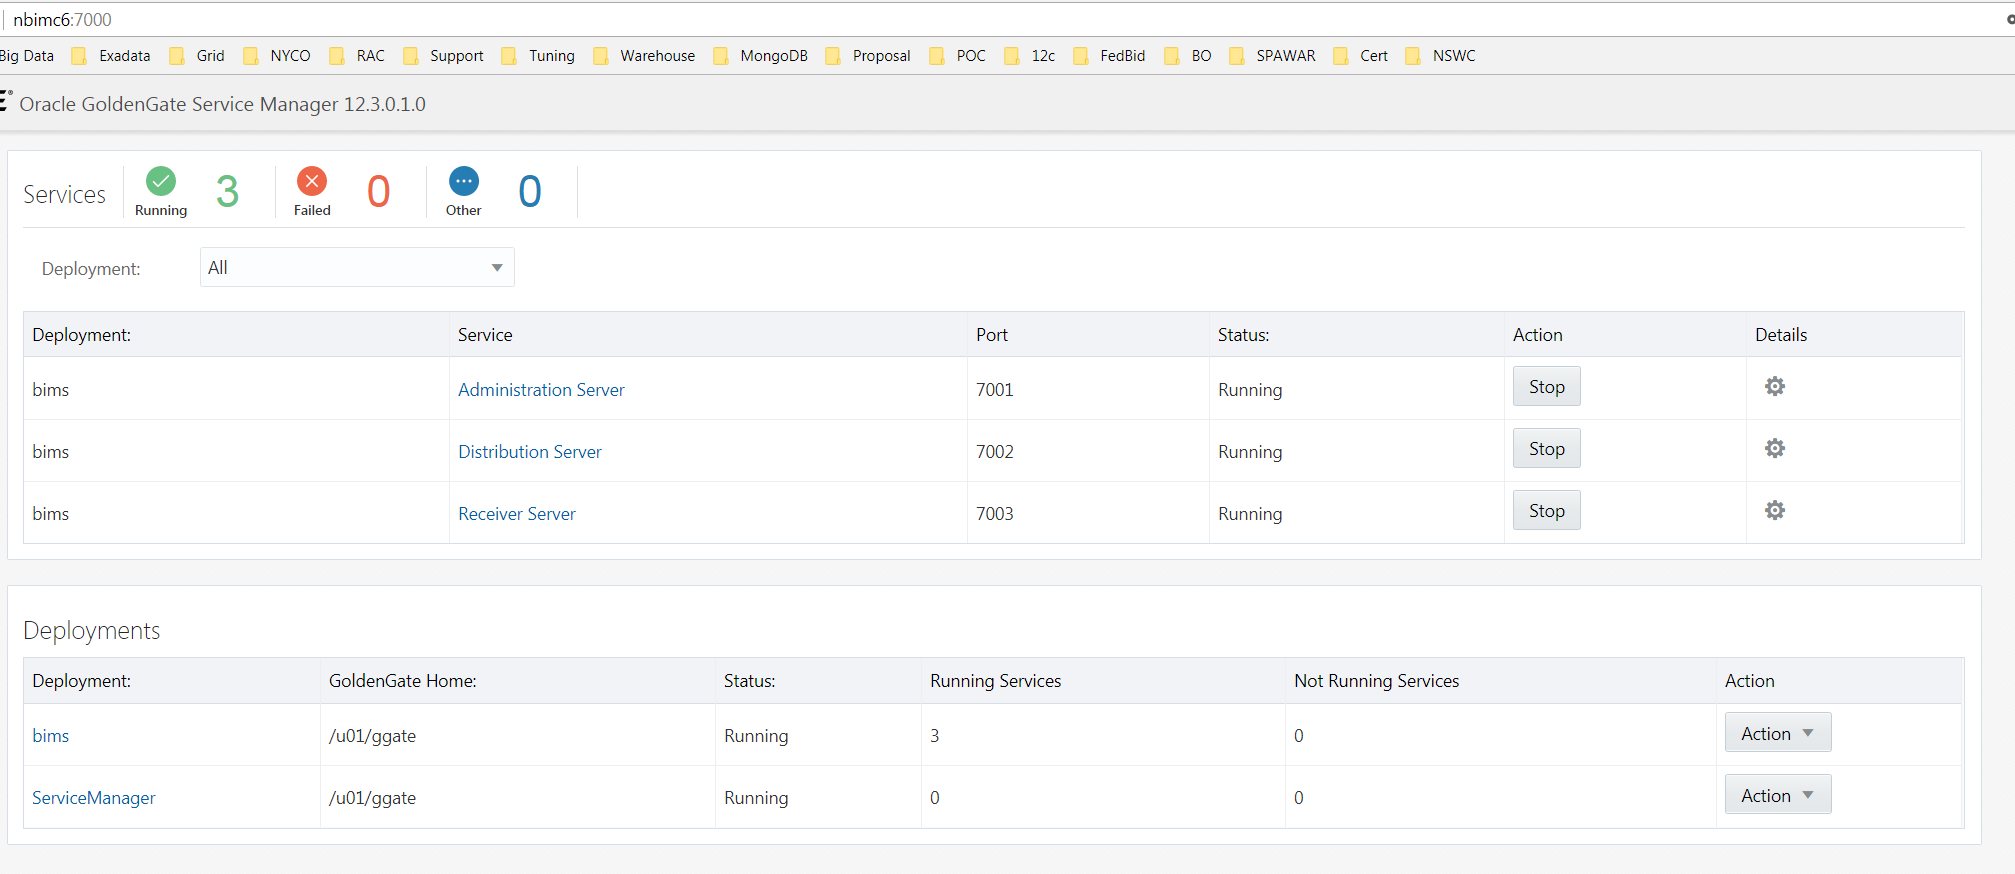
Service Manager
If you have multiple databases setup for replication, you would want to have a deployment for each one. The Service Manager gives you a view of all deployments. You’ll get a better idea of this later on in this example. It has its own interface. You can view this on the target or source, depending on what you want to look at.
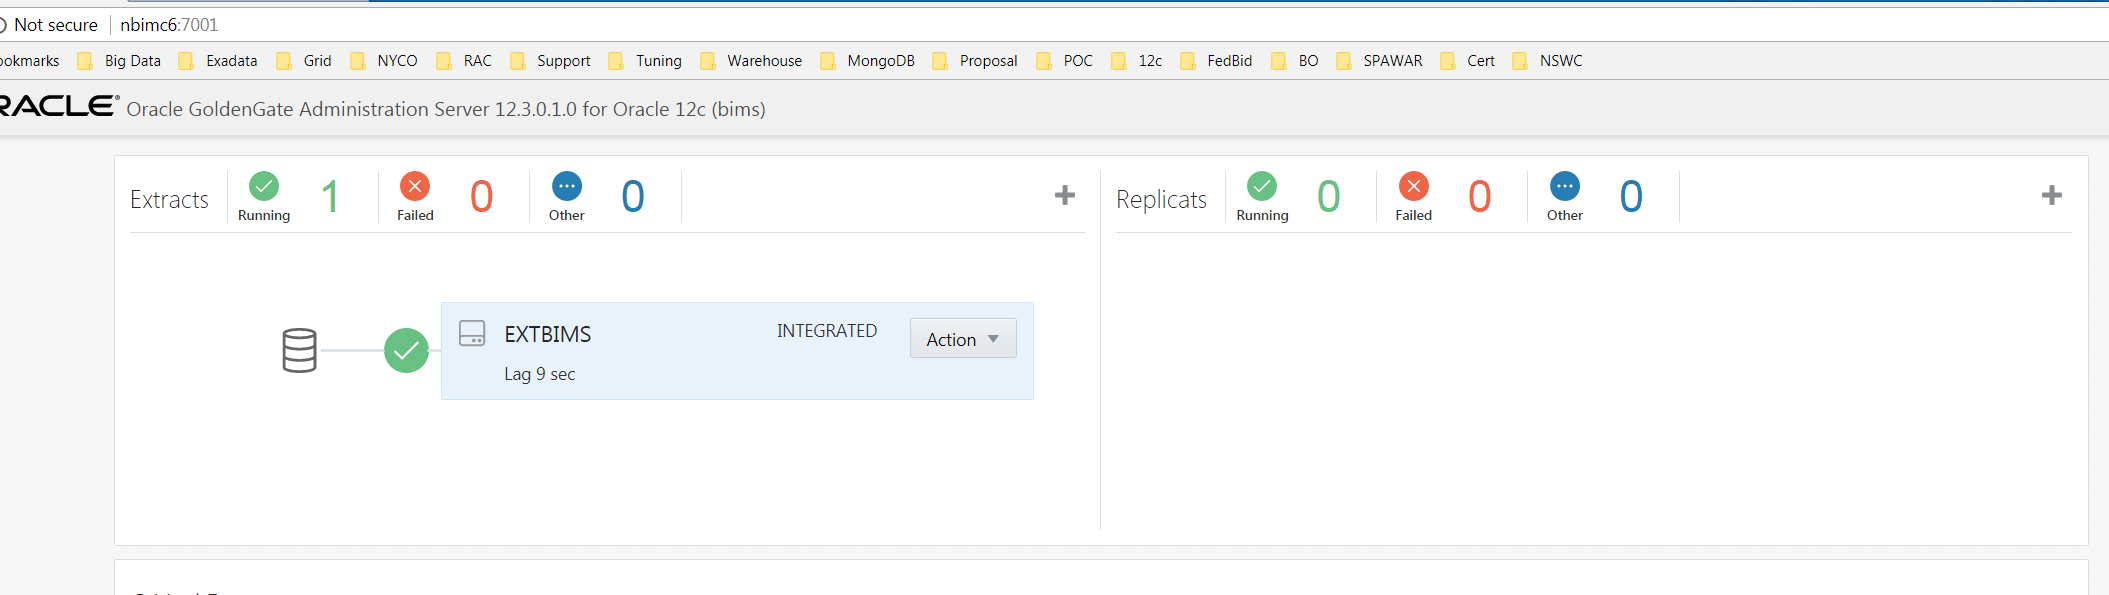
Administration Service
Think of this as the stuff you use ggsci with, it’s used for administering GoldenGate. Once you have the software installed you can use “adminclient” like you use ggsci if you love command line. This can be viewed on the target or source, depending on what you want to look at.
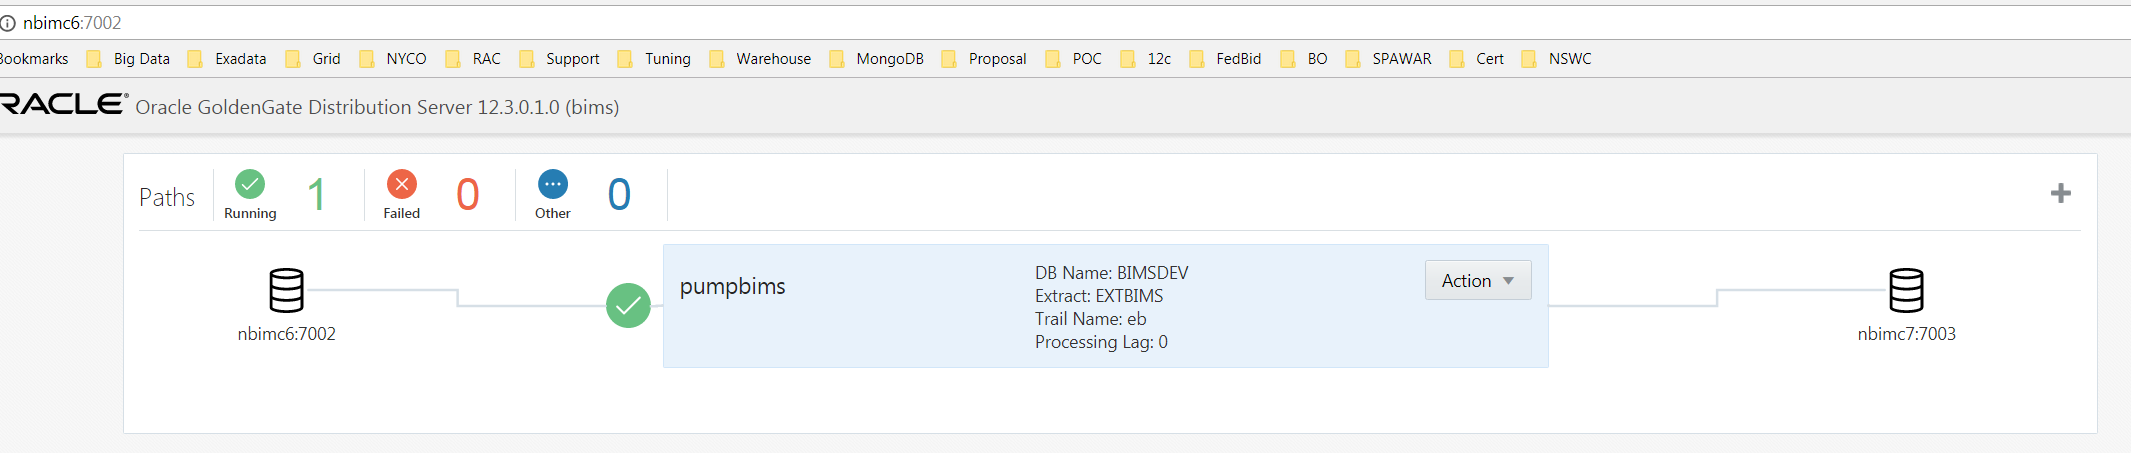
Distribution Service
This is data pump in non-microservices GoldenGate terms. Basically, it allows you to link extracts to replicate jobs. You would view this from the source.
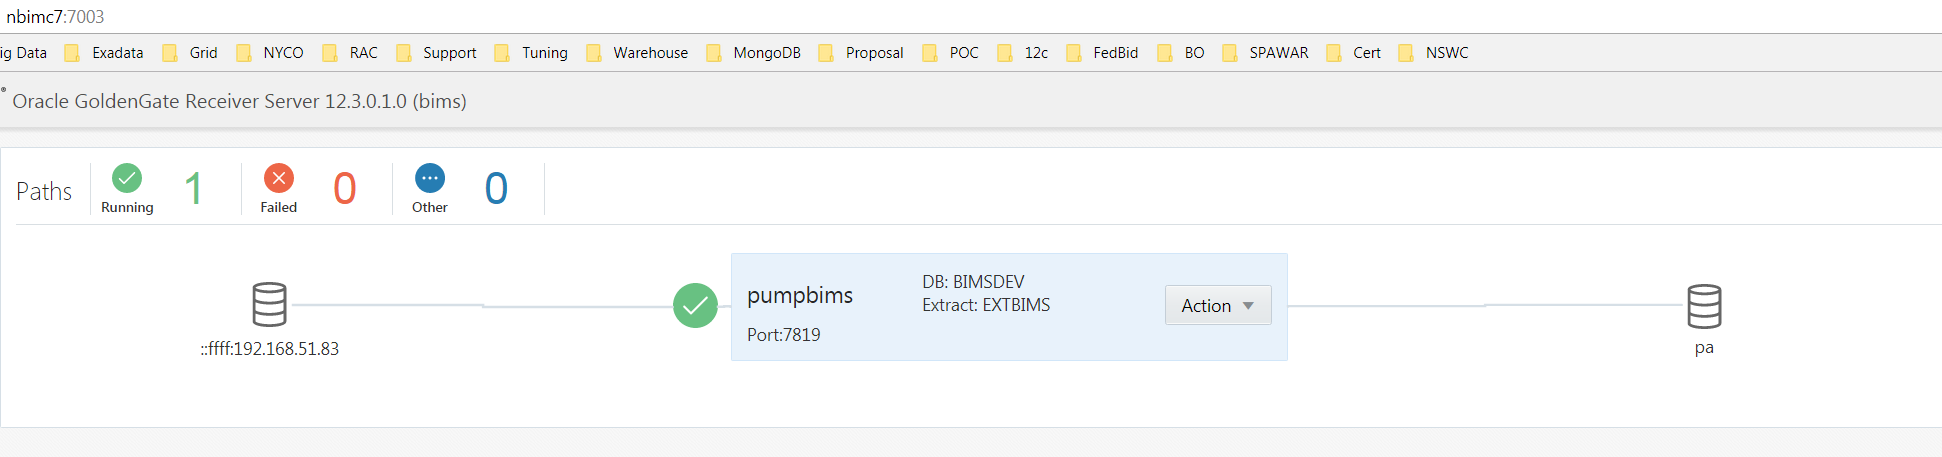
Receiver Service
This allows you to view the data flow from the source to the target, but from the target’s point of view. I guess you could say if you have one source and one target, the Distribution and Receiver service should look almost identical. Almost.
Metrics Server
This is an Oracle “option” meaning it costs money to use it. Metrics Server allows metrics monitoring for those inclined to pay for that type of capability. It doesn’t keep with the KISS principle and I don't want to assume everyone has it so for now, no thanks.
Prerequisites
a. You already have your database software installed.
Apply patch 20448066 to the RDBMS software on the source and target otherwise you may experience issues setting up initial extract. I learned this the hard way and had to open an SR when the extract creation was giving a permission denied error. First, Support had me grant a ton of privileges (you’ll see them below). Ultimately, the patch was the issue.
b. You have created two databases to replicate between, so for this scenario:
- bimsdev is the source database on host nbimc6
- metadata is the target database on host nbimc7
- data being replicatd is in the bims schema
- Ensure compatible is set to 12.1.0.2.0
- Source database must be in archivelog mode. The target is not required to be in archivelog mode
c. The listener is configured and listening for both databases involved with the replication.
d. The tnsnames.ora on each server has entries for both databases.
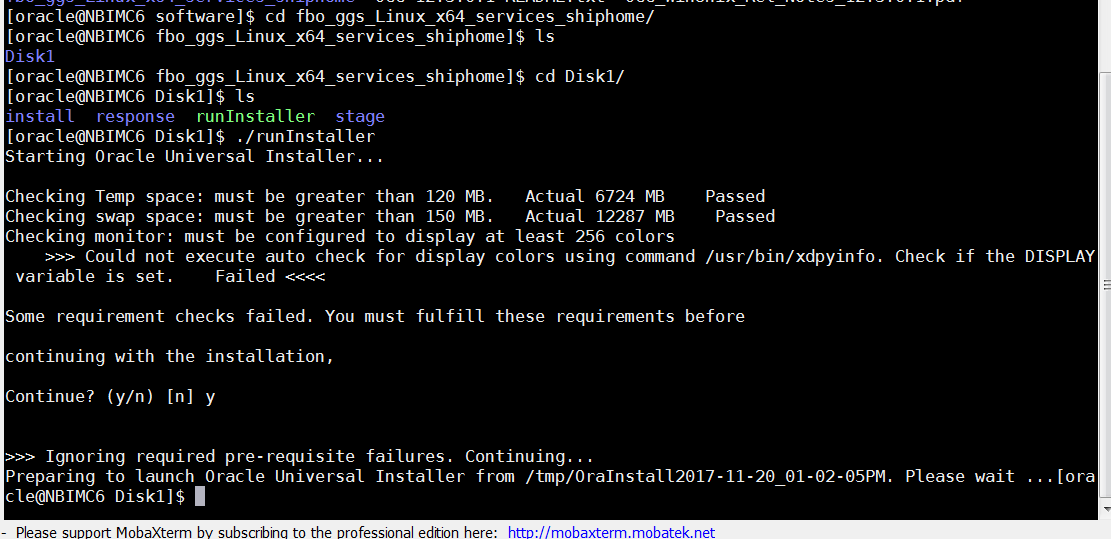
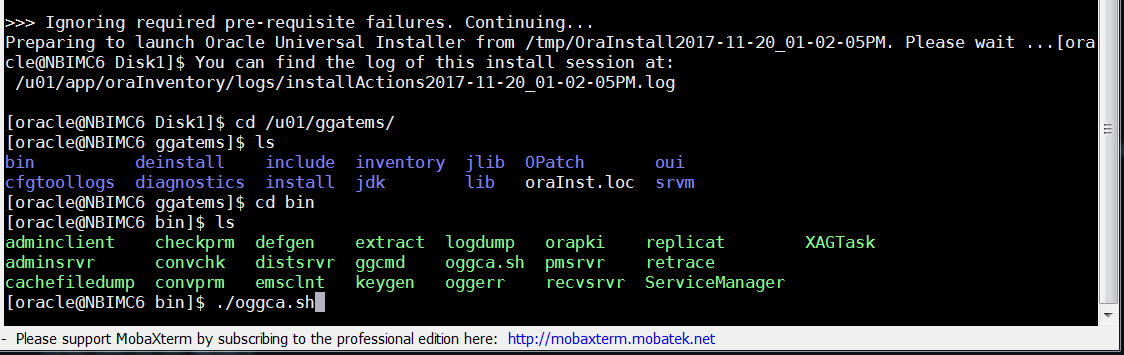
e. You have a XWindows tool to perform the install. In this case, I used MobaXterm.
In this case, we are using database running Oracle RDBMS 12.1.0.2 on Linux. If you also have Oracle 11.2.0.x installed, the instructions below include how to set that up.
12.1.0.2 Setup Instructions
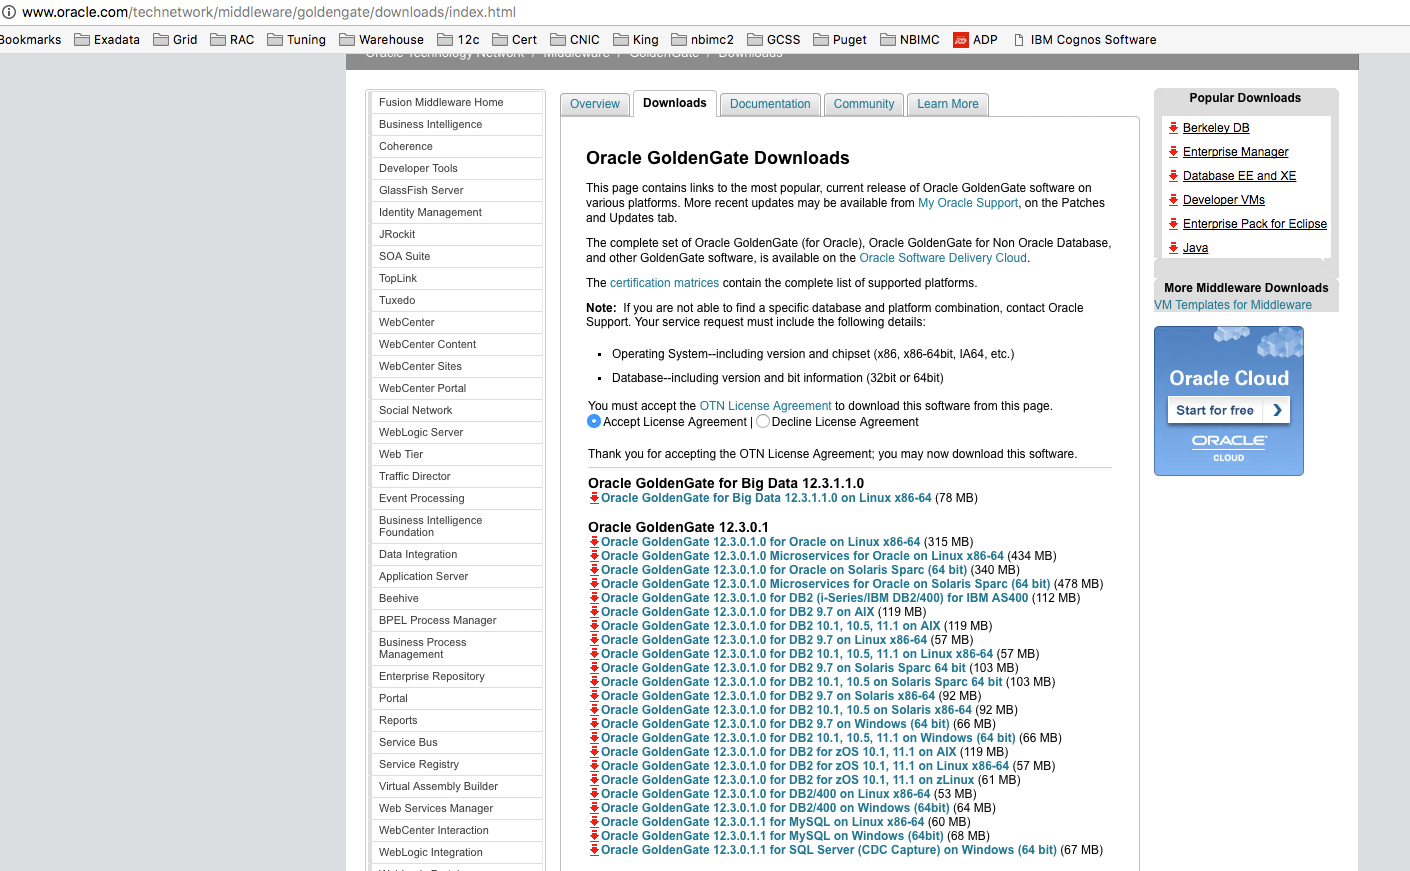
Download the software (latest version).
Create a directory to load the software into.
mkdir ggate
chown oracle:oinstall ggate
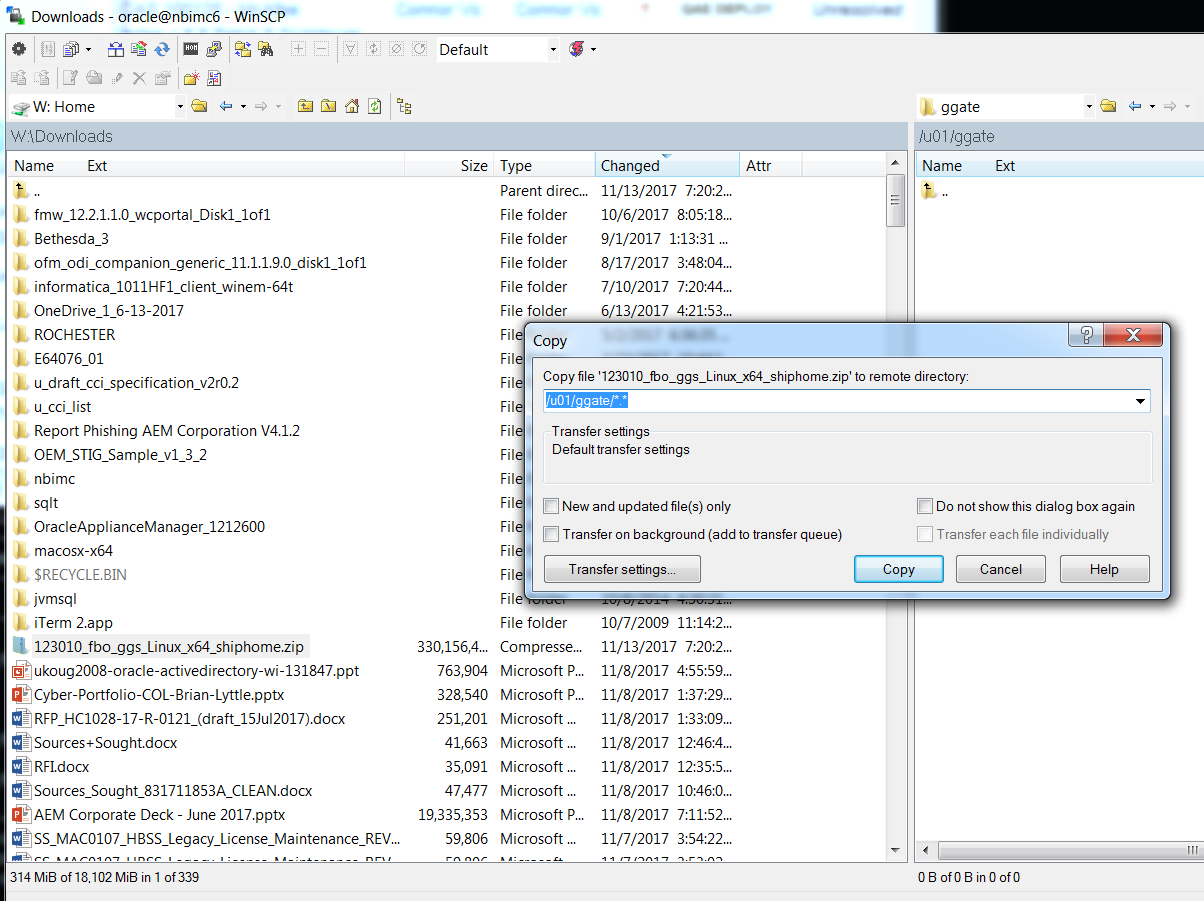
Copy the software to the server.
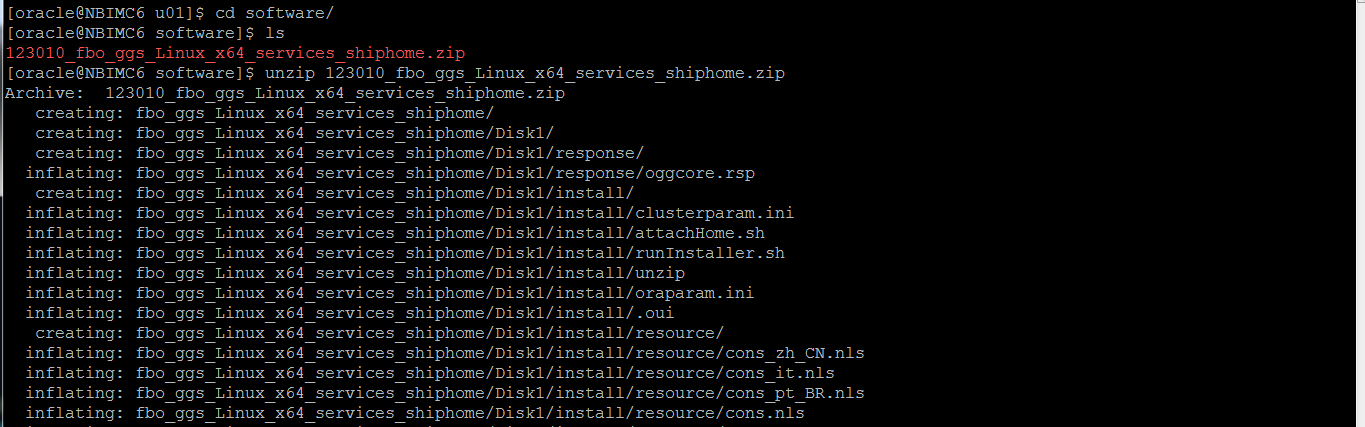
Unzip the downloaded file.
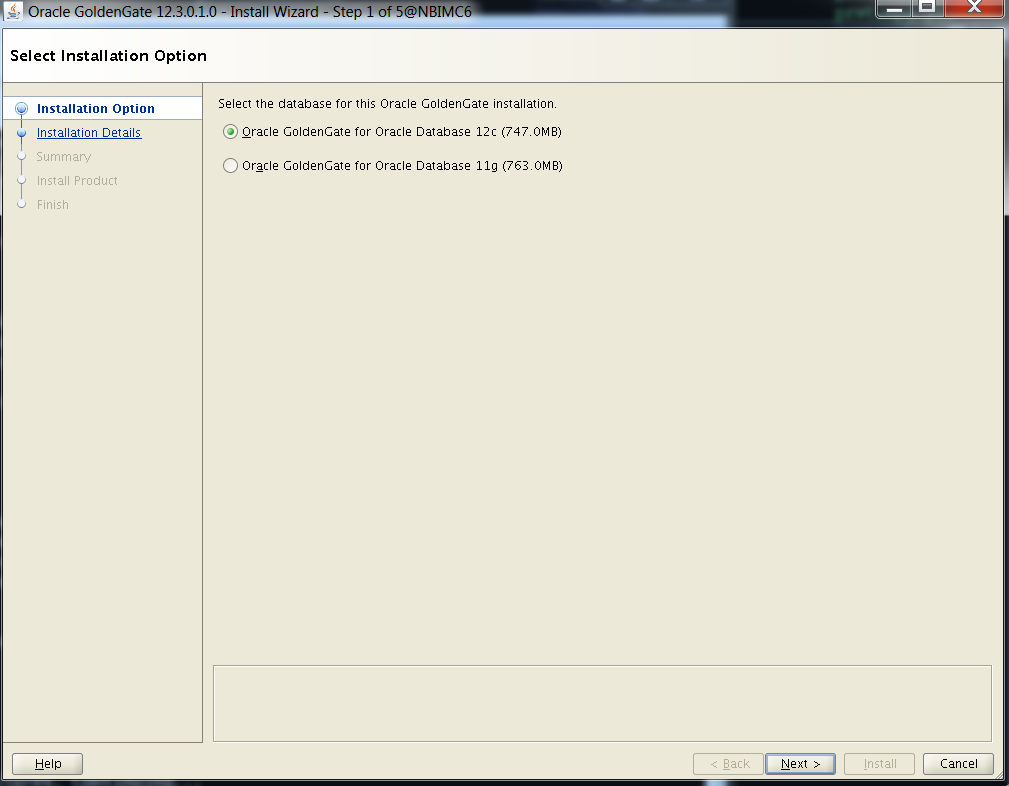
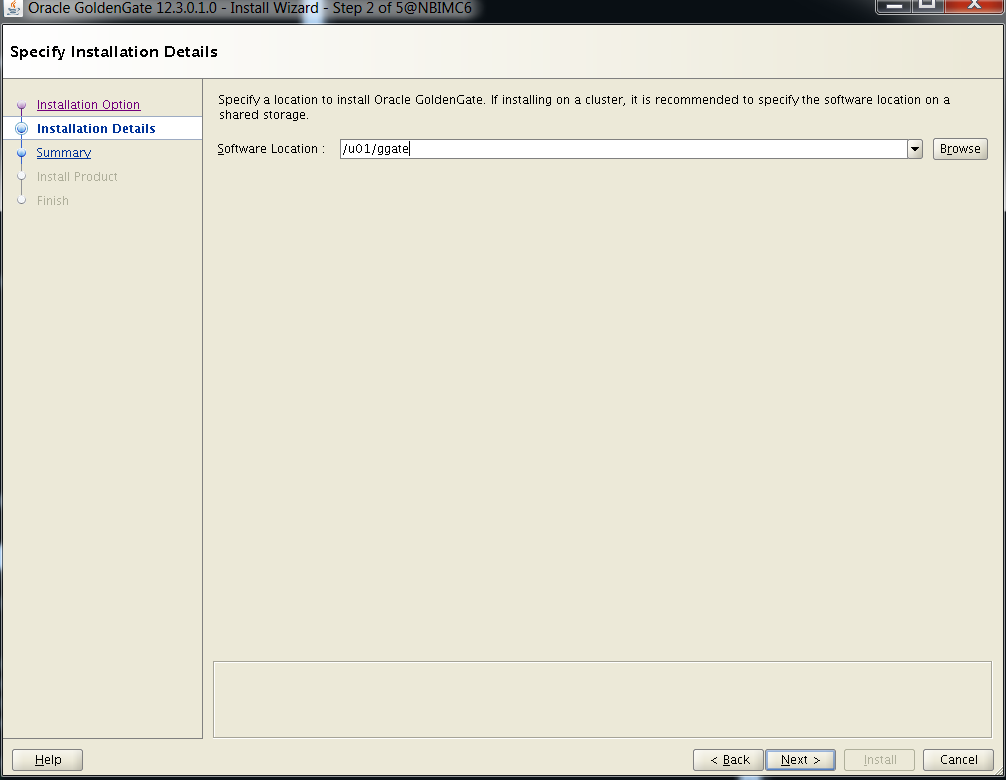
Install GoldenGate software (for 12.1.0.2 RDBMS) on source and target server. You’ll notice there is an option for installing 11.2.0.1 RDBMS so if you are replicating a database with that version, choose that option.
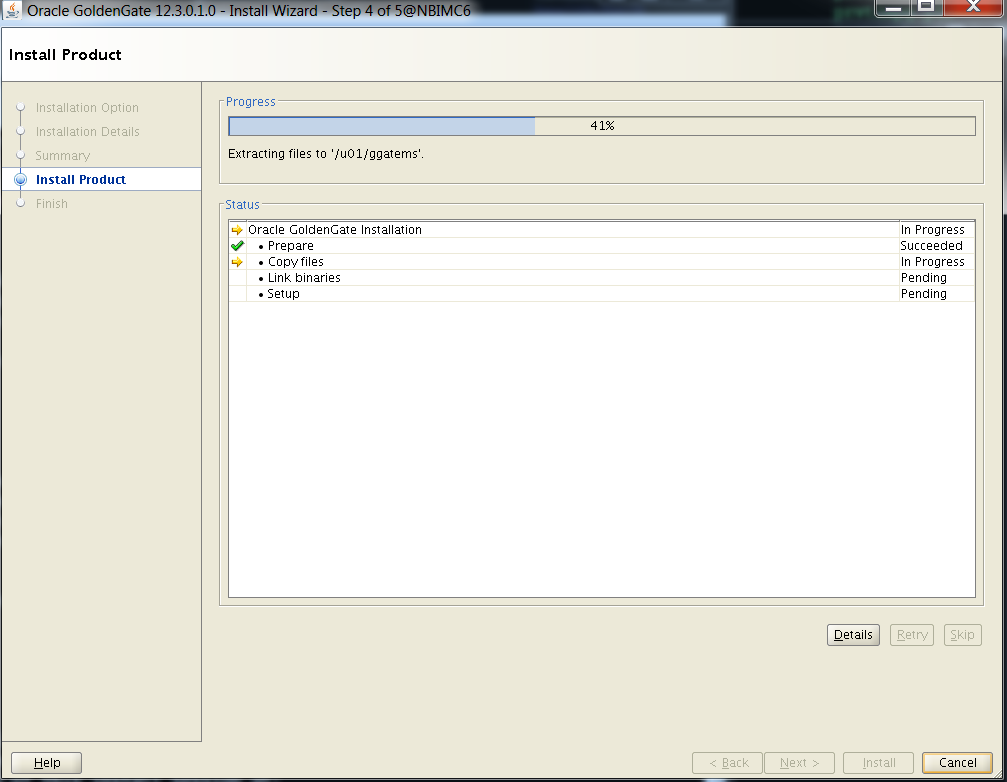
Once again, repeat for the target server.
Setup the databases (for each database involved in replication). You can enable supplemental logging for the entire database or at the schema level. In this scenario, I went with entire database.
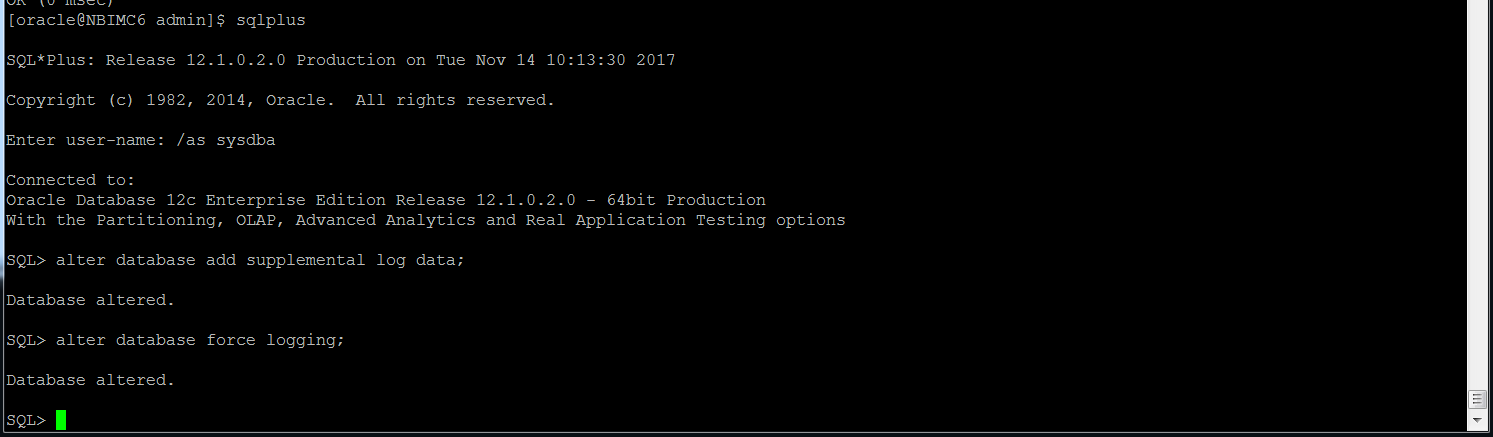
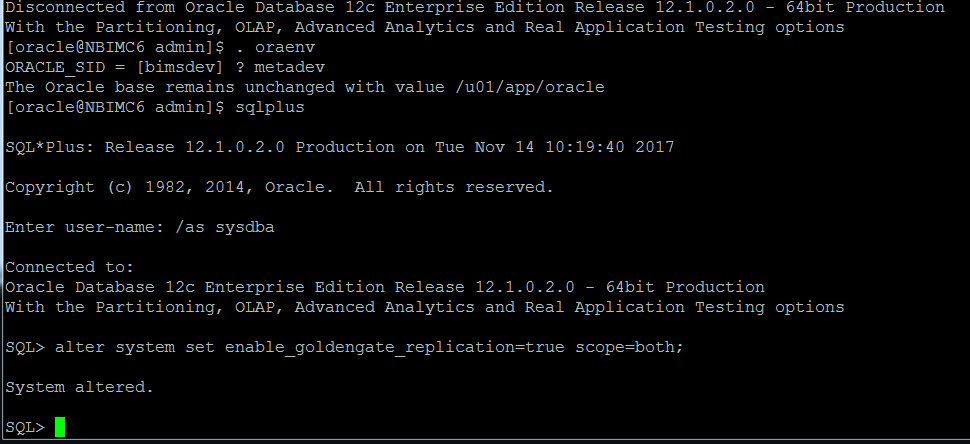
Enable the appropriate parameters for GoldenGate in the database (for each database involved in replication).
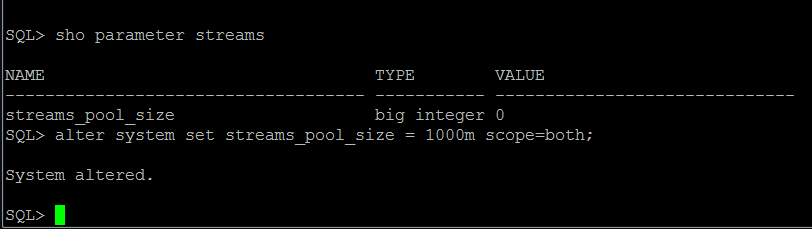
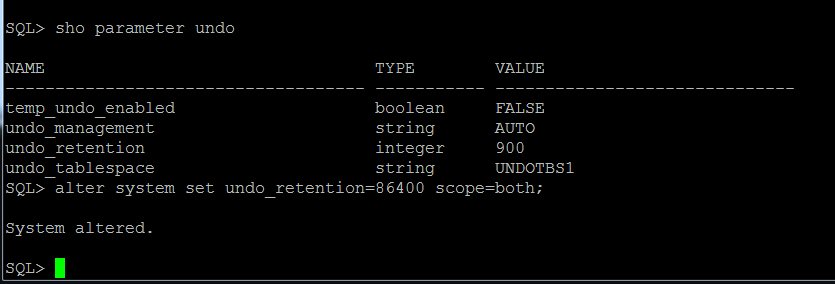
Make sure undo_management and undo_retention are set to appropriate values on all involved databases.
Create users on each database for GoldenGate management (source/target).
CREATE USER GGADM IDENTIFIED BY password TEMPORARY TABLESPACE "TEMP";
exec dbms_goldengate_auth.grant_admin_privilege('GGADM');
exec dbms_streams_auth.grant_admin_privilege('GGADM');
grant insert on system.logmnr_restart_ckpt$ to ggadm;
grant update on streams$_capture_process to ggadm;
grant become user to ggadm;
grant select any table to ggadm;
GRANT CONNECT, RESOURCE TO GGADM;
GRANT SELECT ANY DICTIONARY, SELECT ANY TABLE TO GGADM;
GRANT CREATE TABLE TO GGADM;
GRANT FLASHBACK ANY TABLE TO GGADM;
GRANT EXECUTE ON dbms_flashback TO GGADM;
GRANT EXECUTE ON utl_file TO GGADM;
GRANT CREATE ANY TABLE TO GGADM;
GRANT INSERT ANY TABLE TO GGADM;
GRANT UPDATE ANY TABLE TO GGADM;
GRANT DELETE ANY TABLE TO GGADM;
GRANT DROP ANY TABLE TO GGADM;
GRANT ALTER ANY TABLE TO GGADM;
GRANT ALTER SYSTEM TO GGADM;
GRANT LOCK ANY TABLE TO GGADM;
GRANT SELECT ANY TRANSACTION to GGADM;
ALTER USER GGADM QUOTA UNLIMITED ON users;
alter user ggadm quota unlimited on users;
exec dbms_goldengate_auth.grant_admin_privilege('ggadm','*', grant_optional_privileges=>'*');
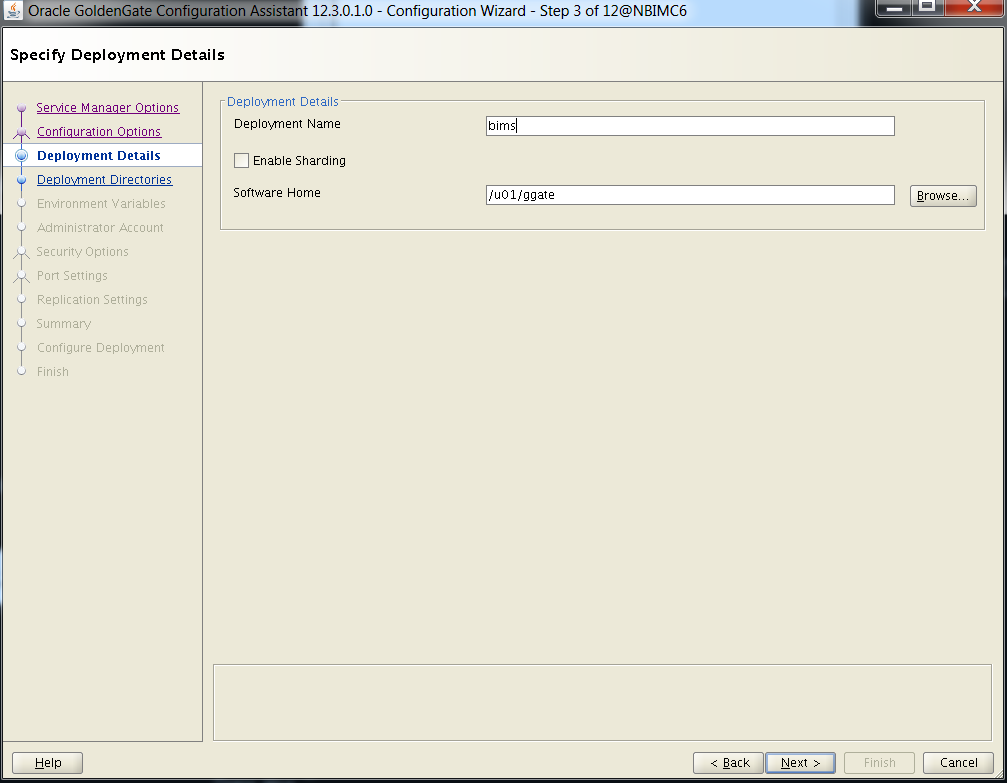
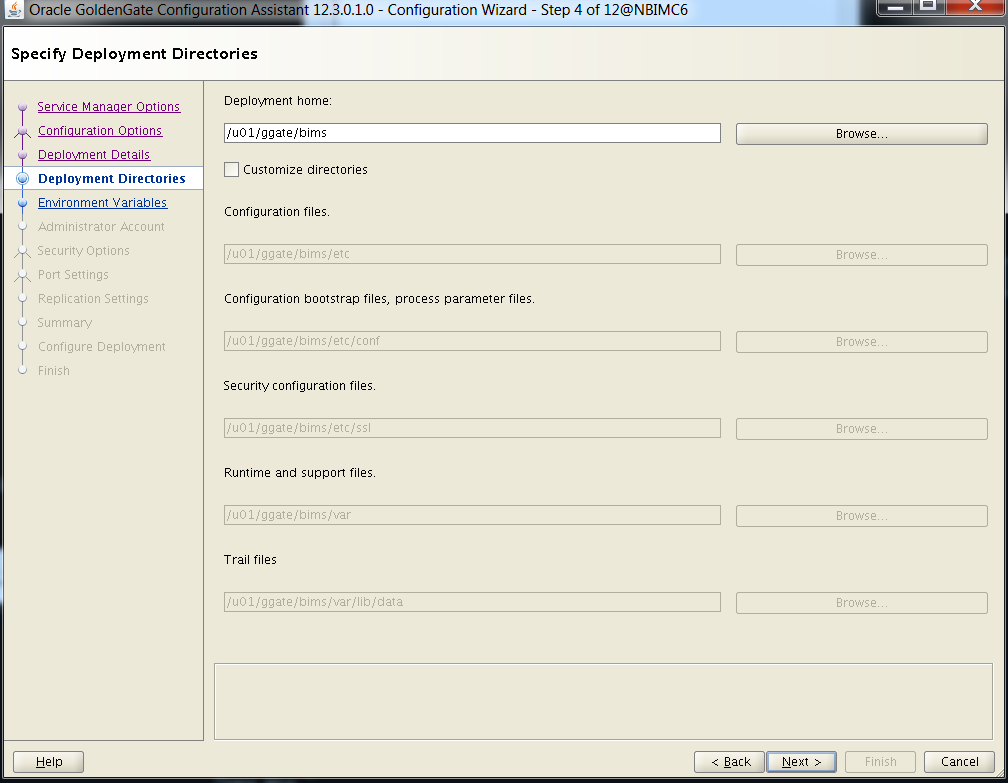
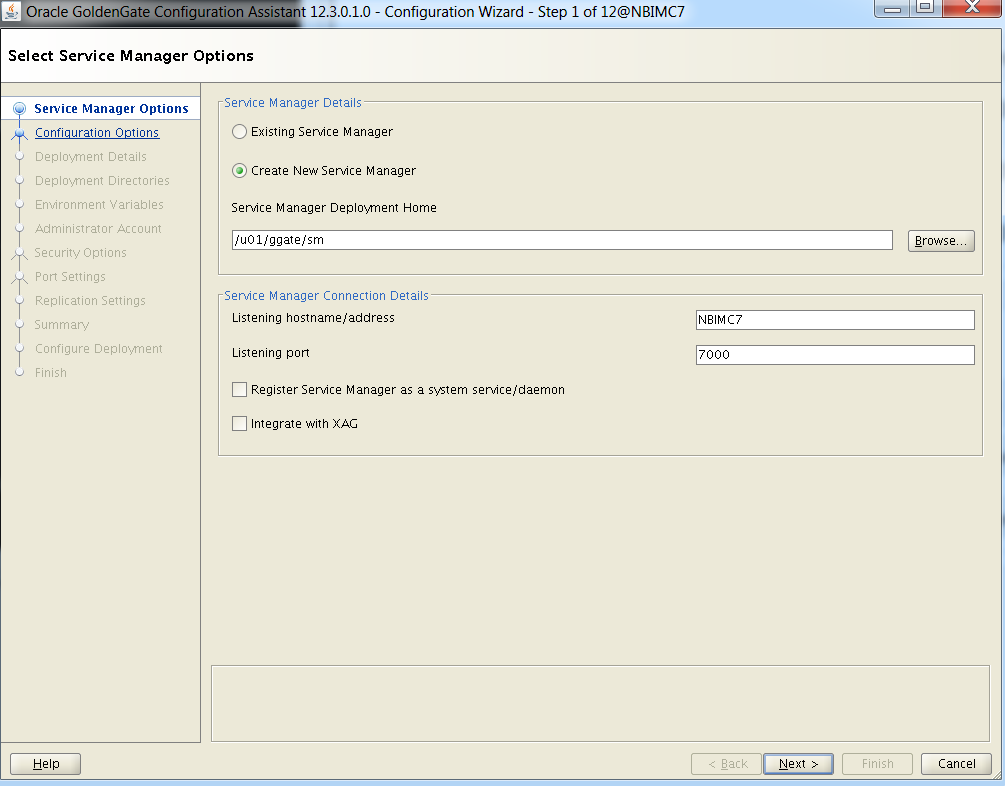
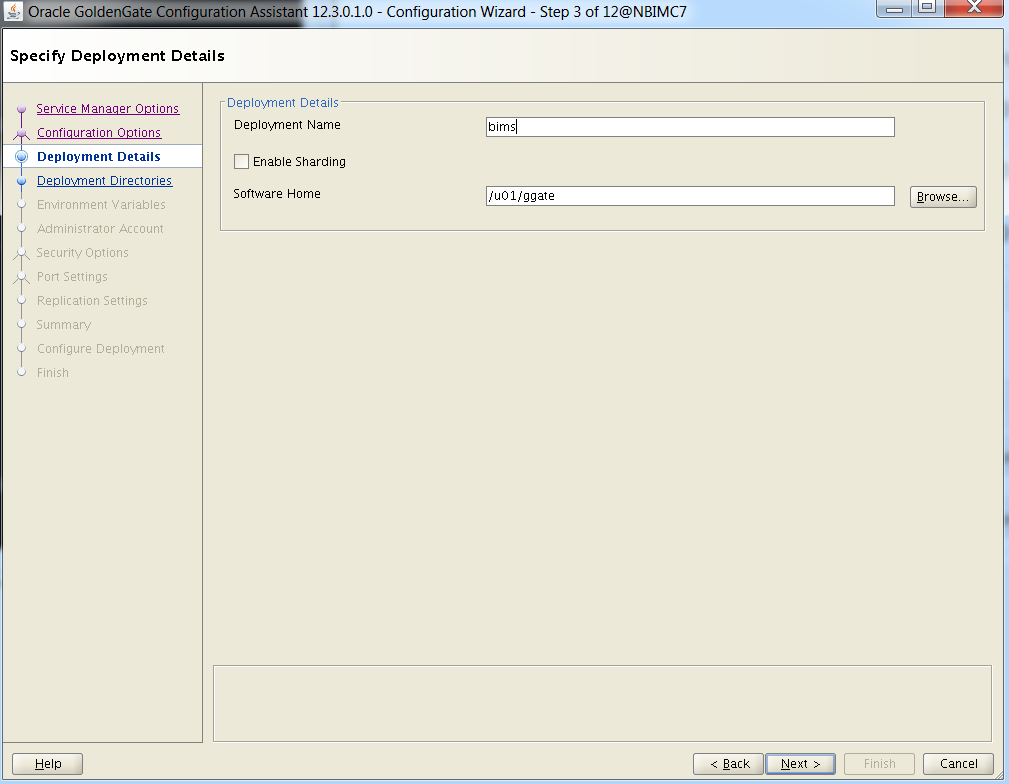
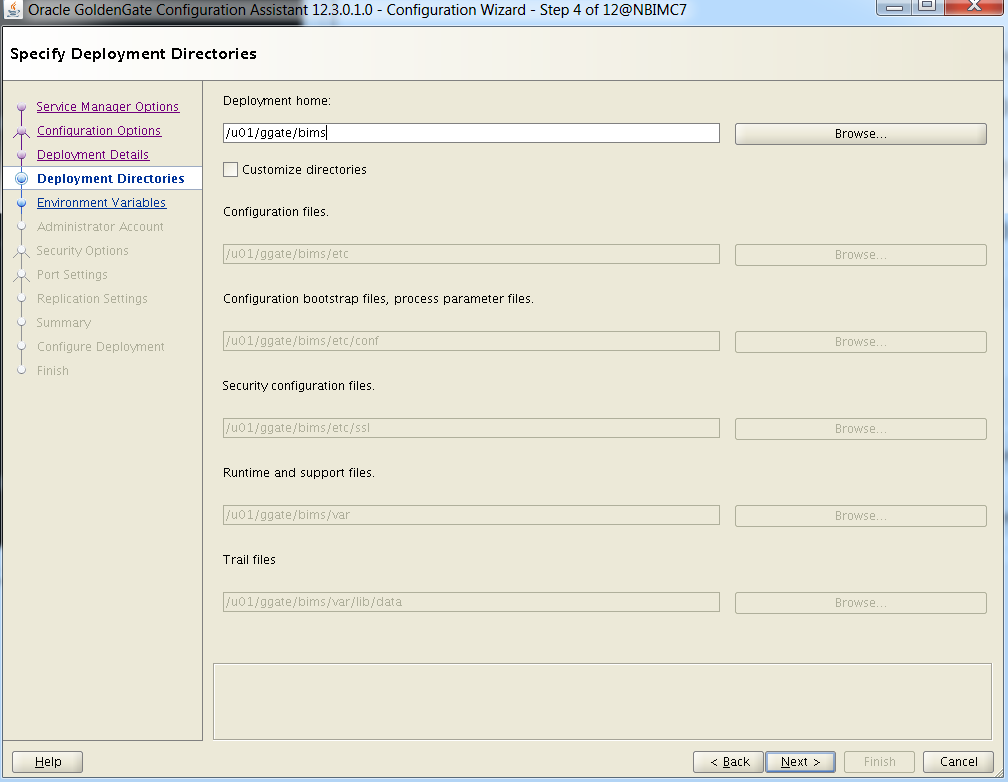
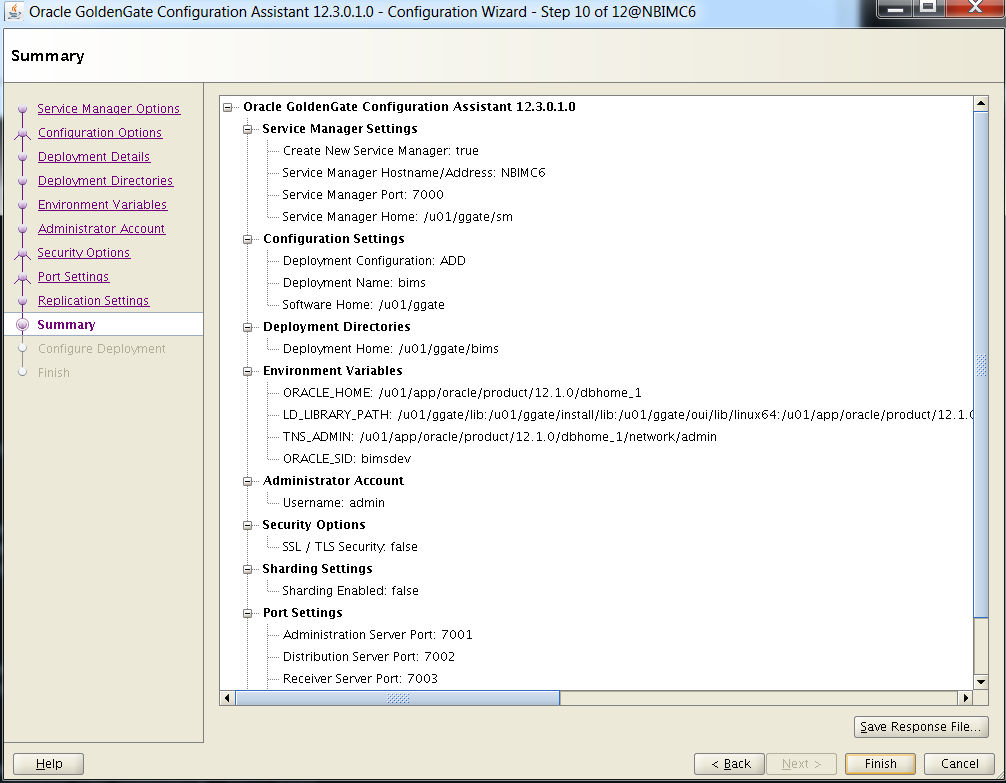
Set up service (on both source and target servers). The sm directory is for Service Manager. The bims directory is for the deployment called bims. I would say each database server would only ever have one Service Manager. However, each database server could have multiple deployments or grouping of replication, depending on the use case.

Used /u01/ggate/sm:
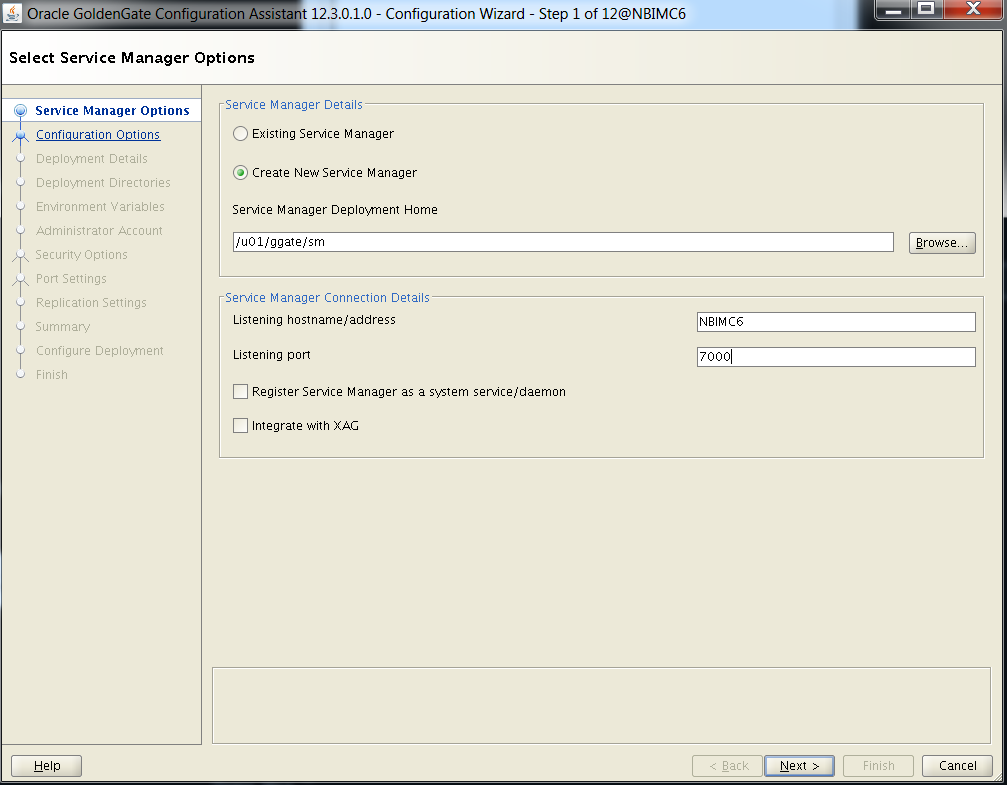

You can put this anywhere, but I decided to put this under the GoldenGate software “home.”
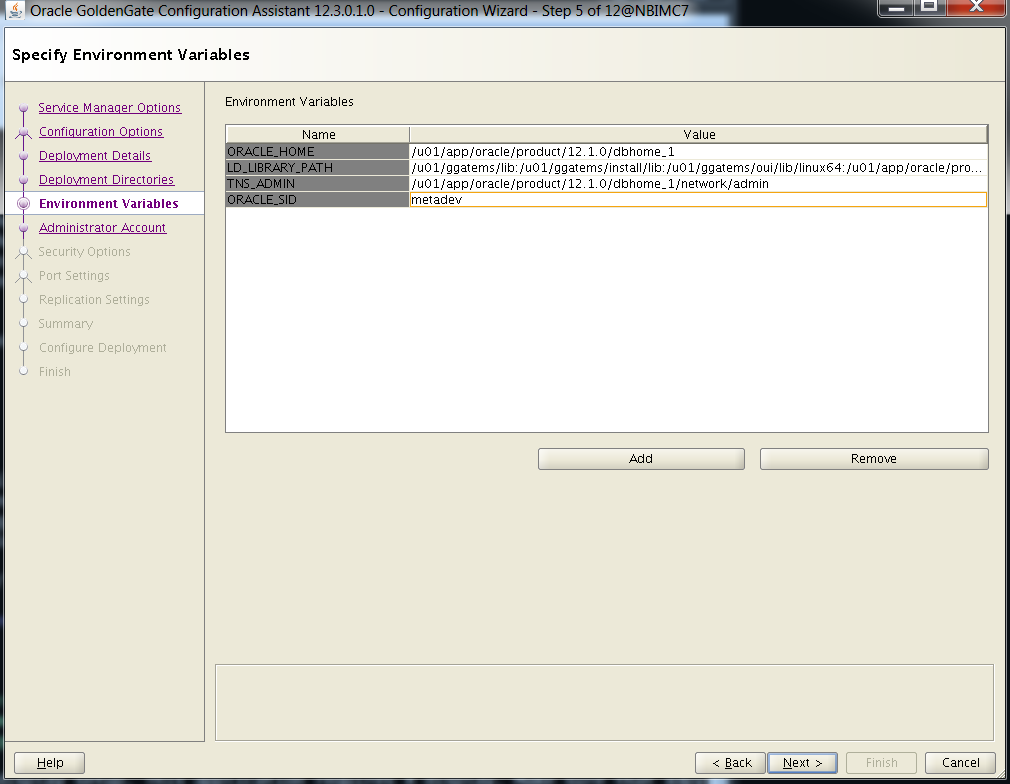
The environment information is automatically picked up, so if you want a different database or need to change any of the environment variables before you move forward, make sure to do that on this screen.
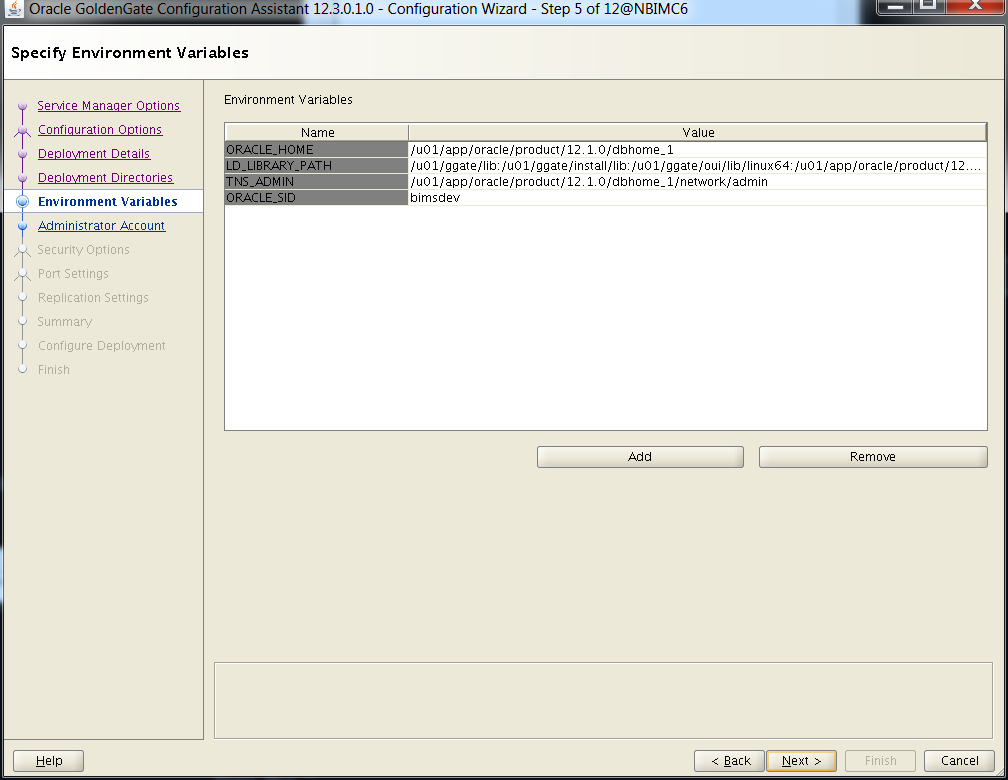
For target, the ORACLE_SID was changed on the screen.
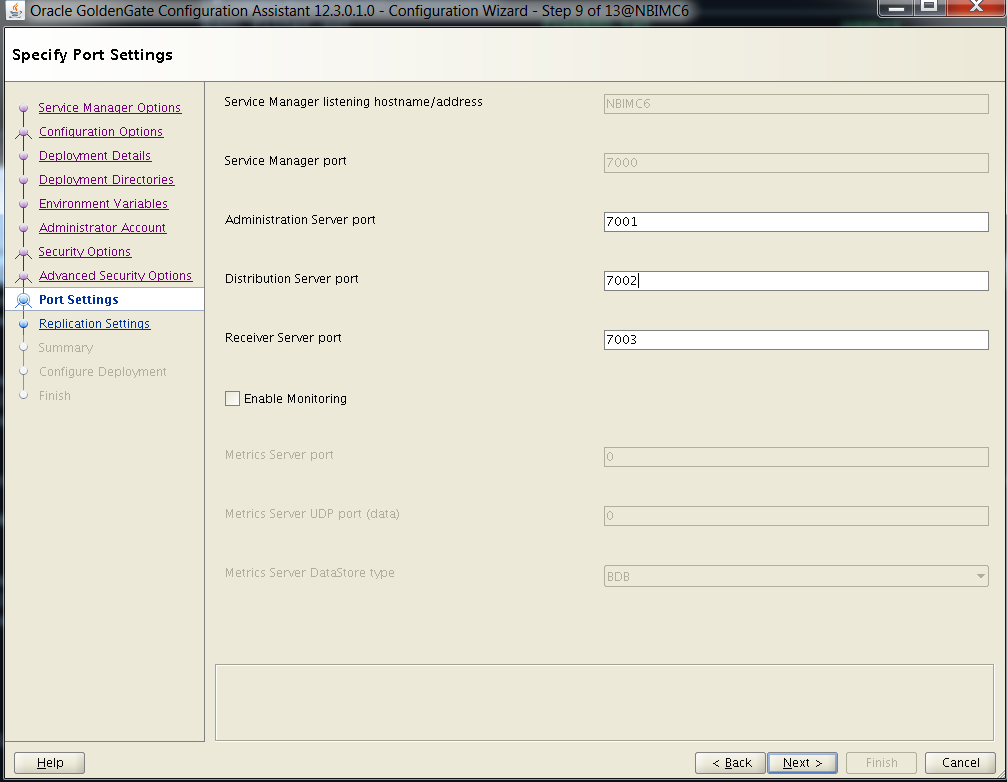
For target, the below options were chosen. If port 7000 is already used on this server for something else, you’ll want to change it on this screen.
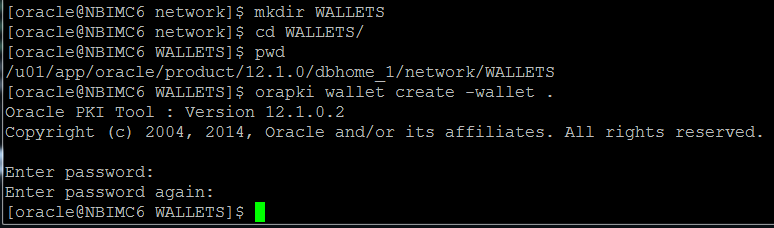
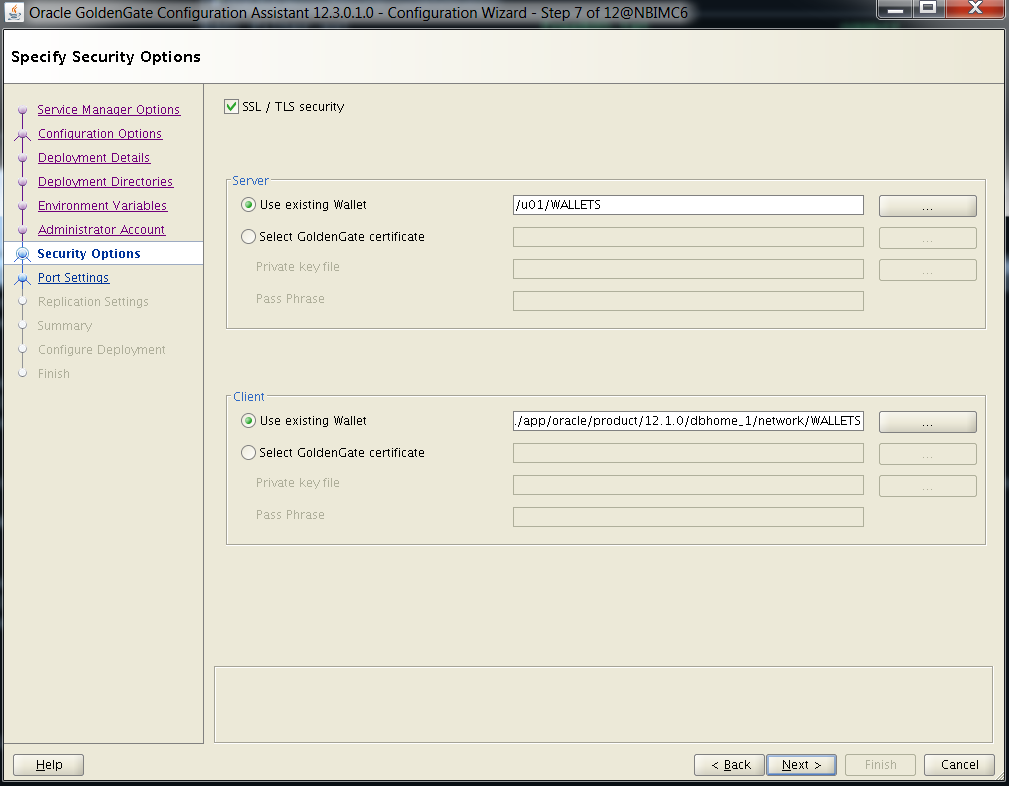
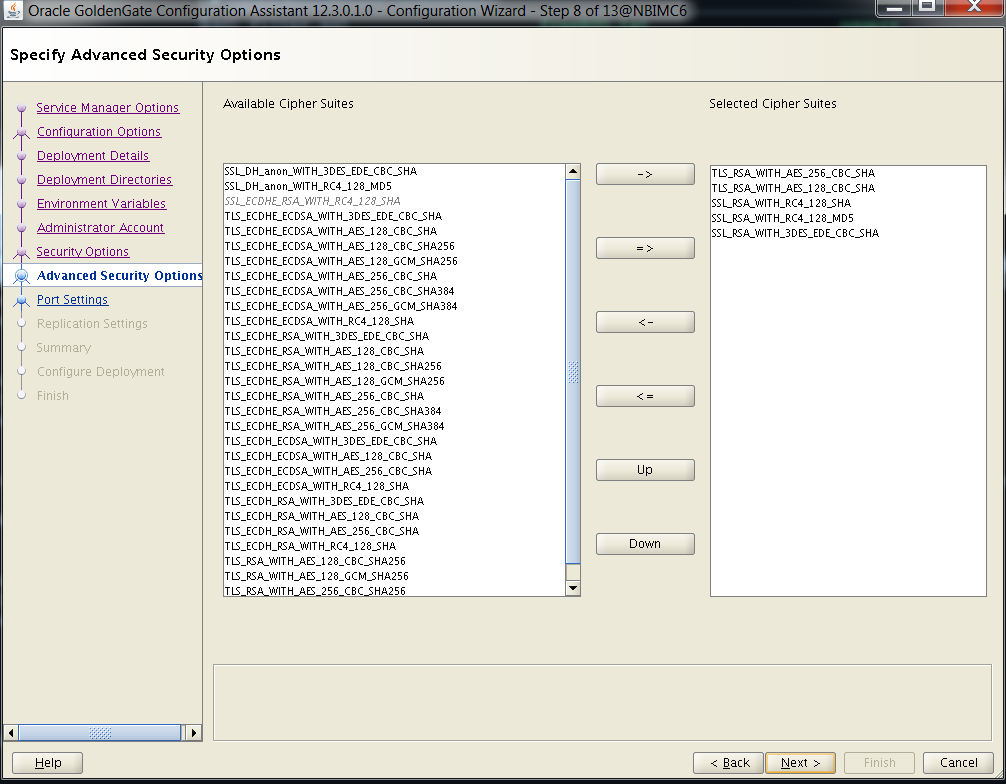
Setup SSL/wallet.
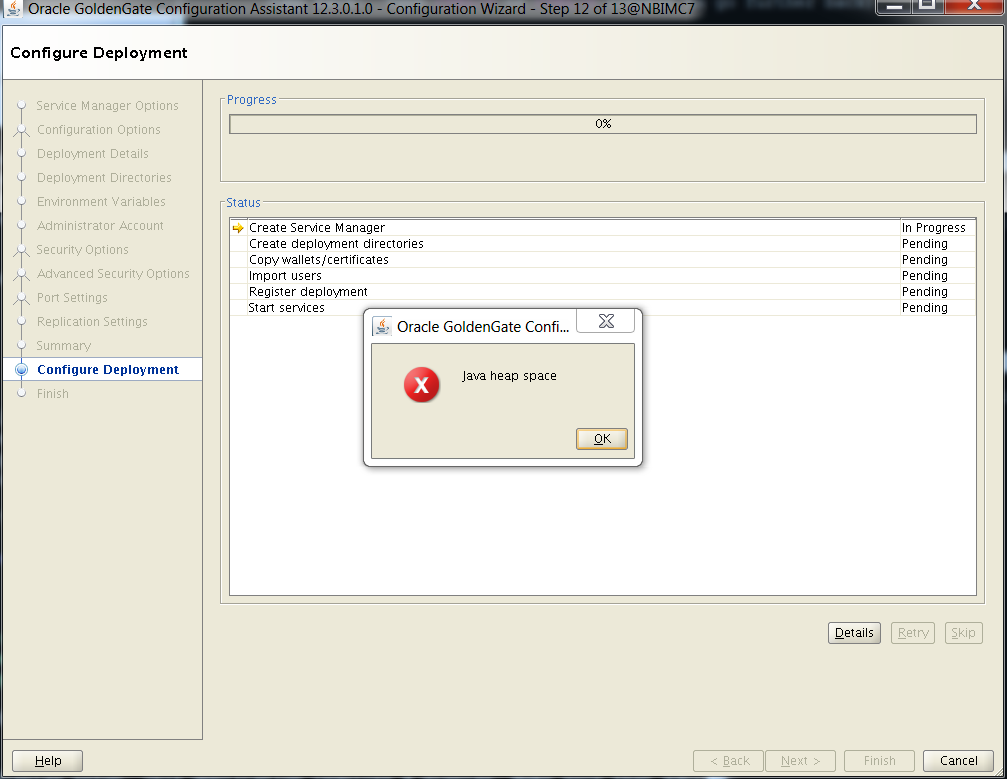
Just a little background on this: I tried on both servers and each time received a Java Heap Space issue. This is clearly something that can be done after the fact. In the interest of sticking with the KISS principle, I’ve included the steps/errors for those that want to try and are curious what errors were received and when they were received. Even if this did work, it’s probably better to do this after the initial configuration to avoid over-complicating the situation. I did not go through the process of getting a third-party certificate or trying to use a self-signed certificate so the issue could be as simple as that.

Server wallet:

Client wallet:
Once you enter the value for Administration Server port, the others are automatically populated. You’ll just want to verify none of these ports are in use.
Specifying the SSL / TLS options gets the below error. You will not receive this error if you uncheck the SSL / TLS security option (from above).
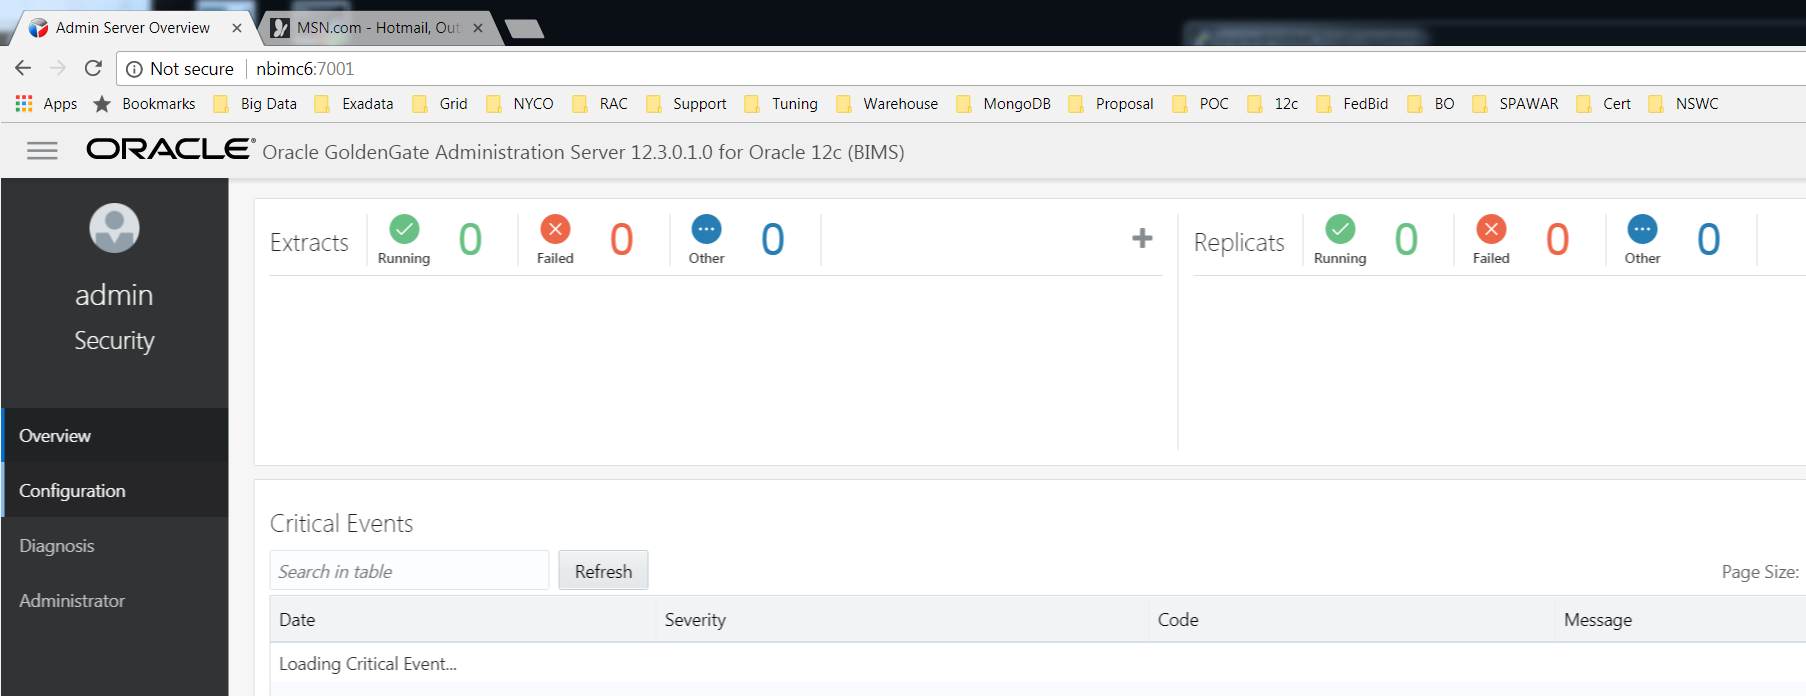
Verify everything is running as expected. It should look similar as below. Don't forget to do this on both the source AND target database servers.

The next step involves setting up the initial extract on the source. This will be used capture changes that will go to the target. To perform the work, log into the source Administration Server.

Select Configuration from the menu item (the three slashes) on the left.
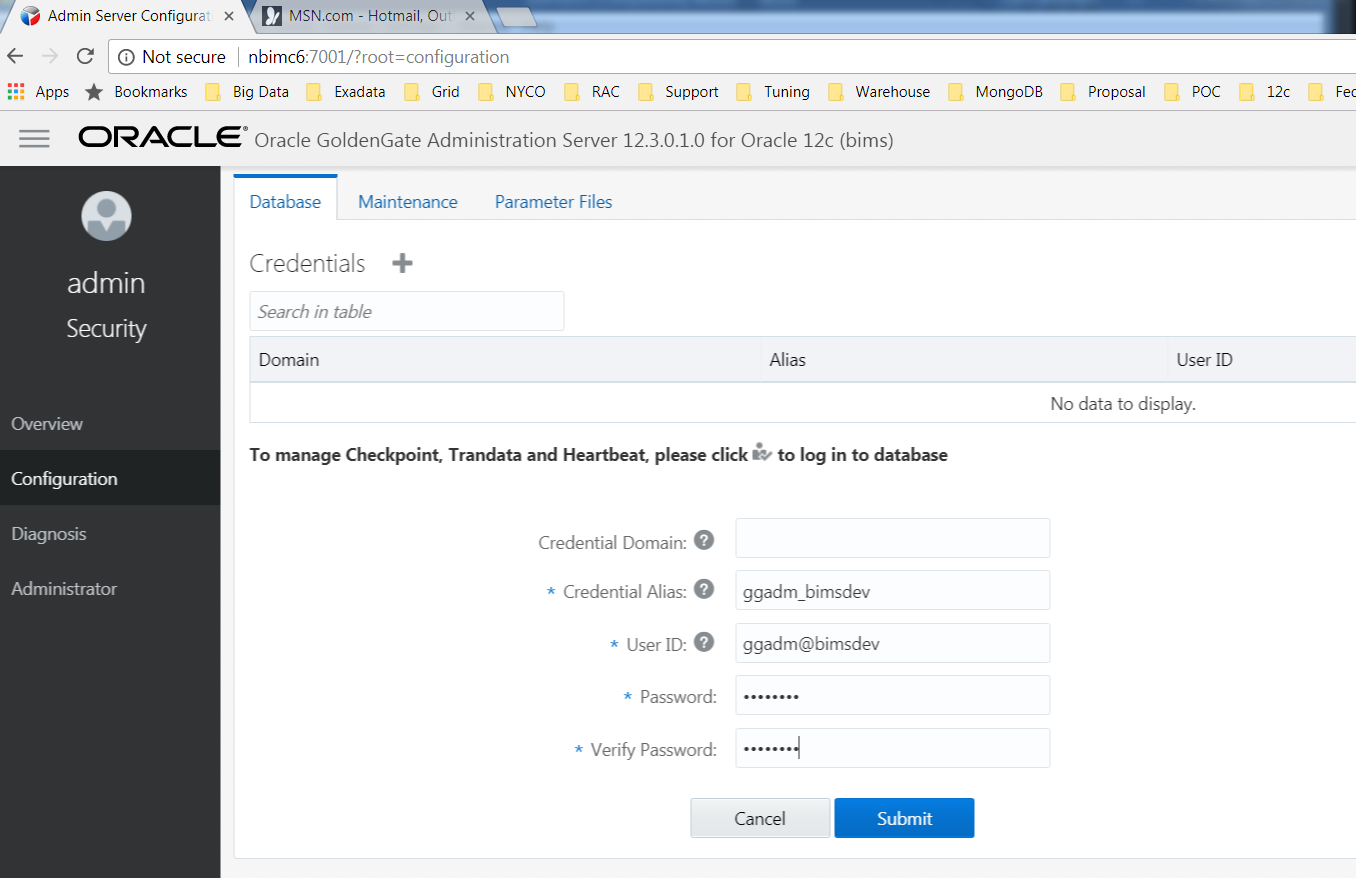
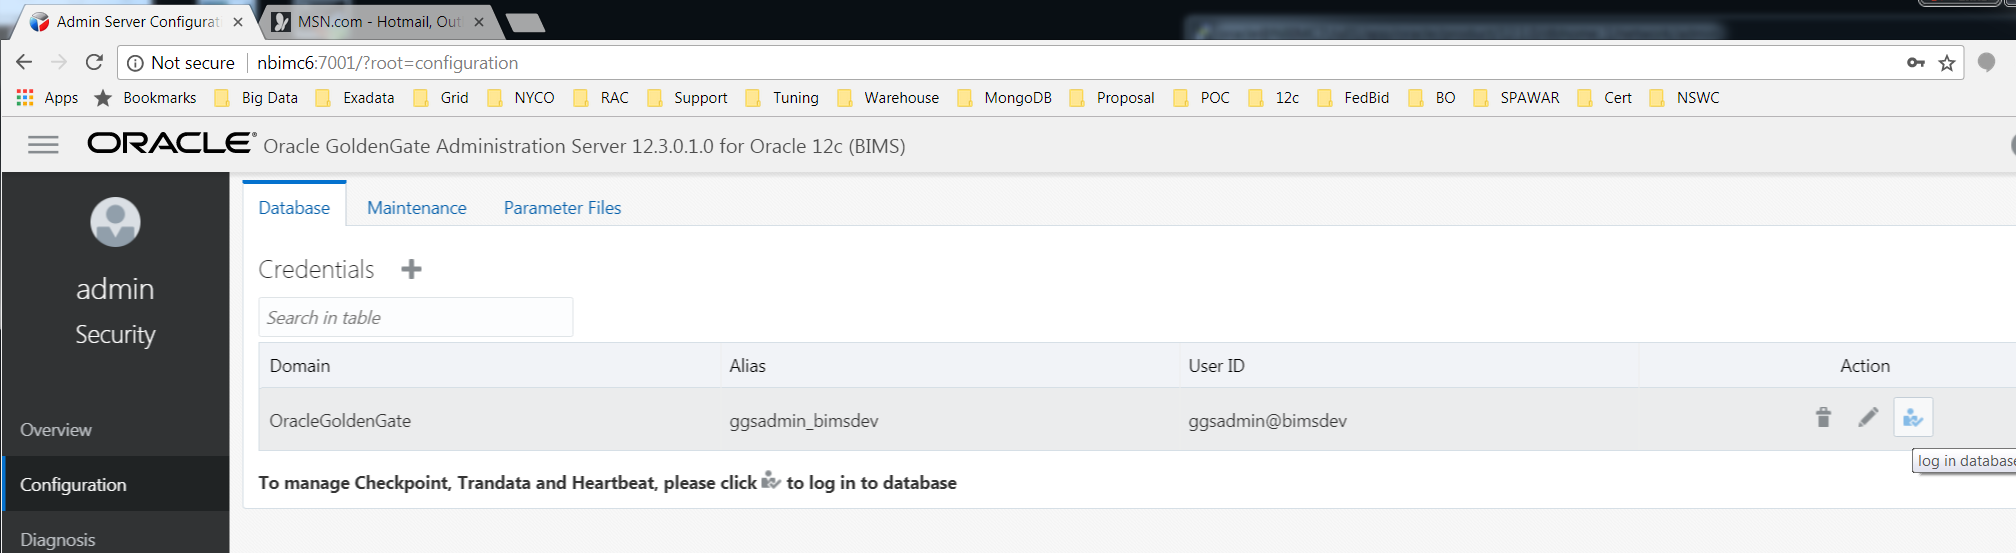
Create the credential store by clicking the + sign. This will be used as the connection string for the initial extract. Repeat this step on the target to be used for the replicat portion.
Click on the login icon.
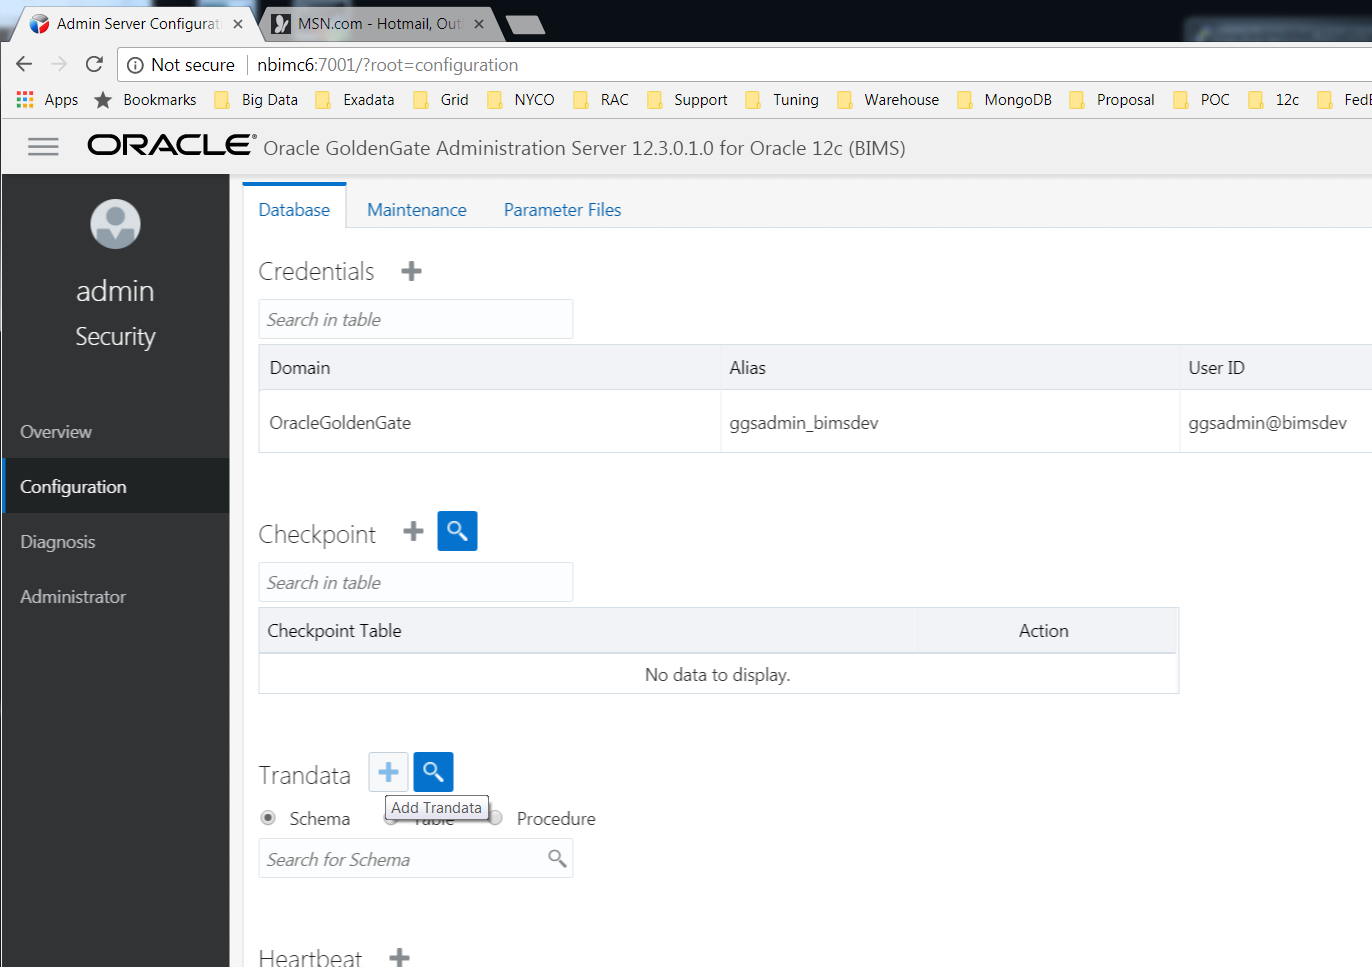
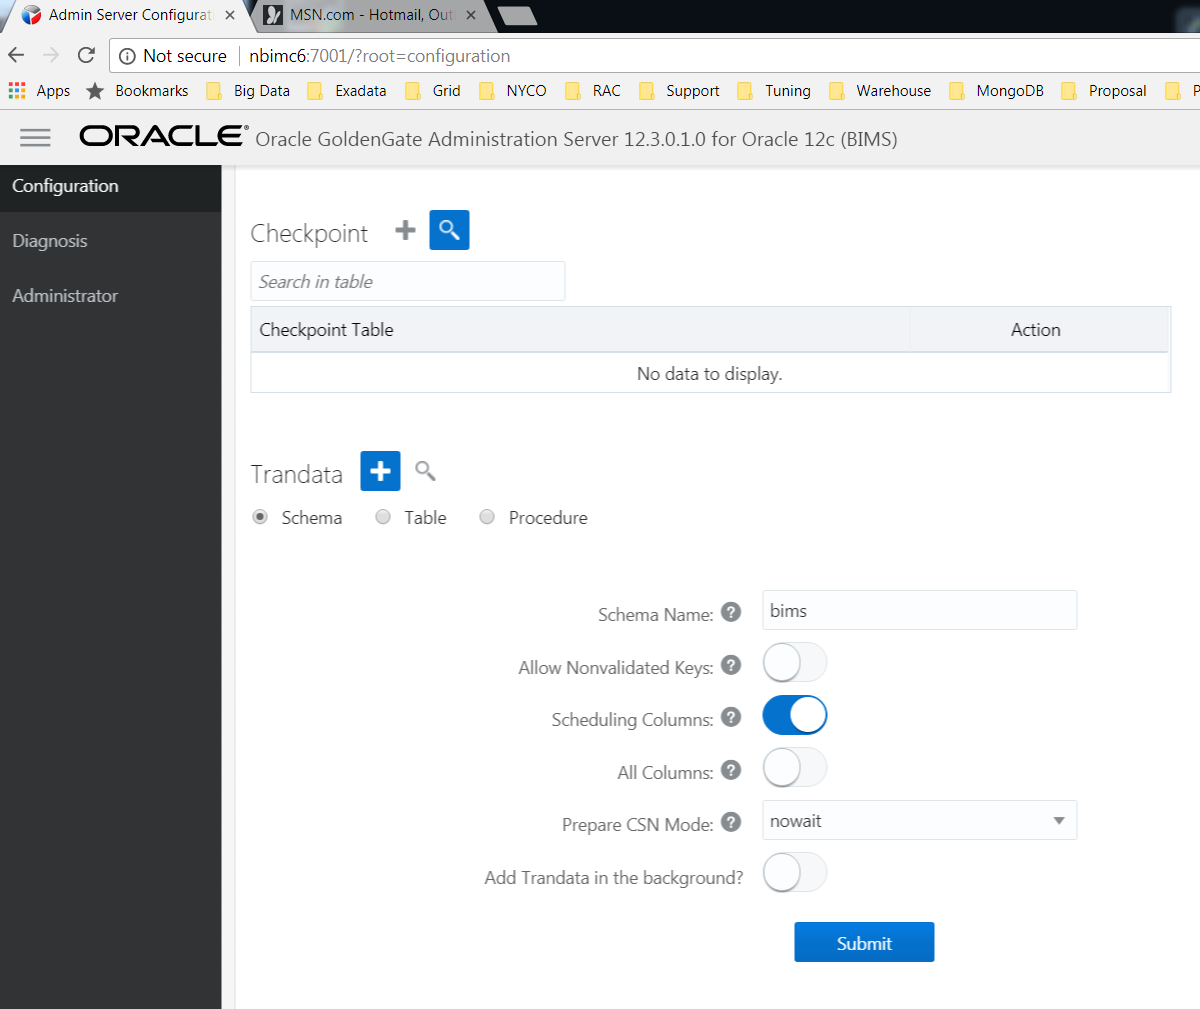
Click on the Trandata + sign.
In our case, choose schema with the appropriate name and click submit when complete.
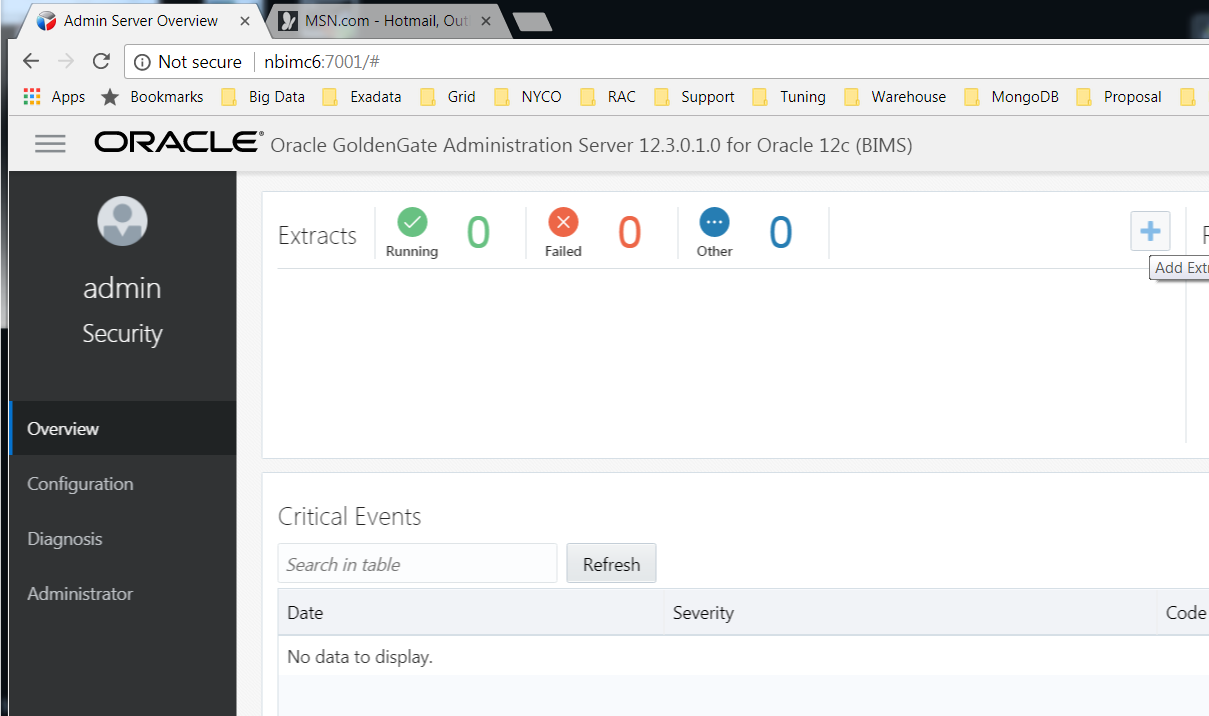
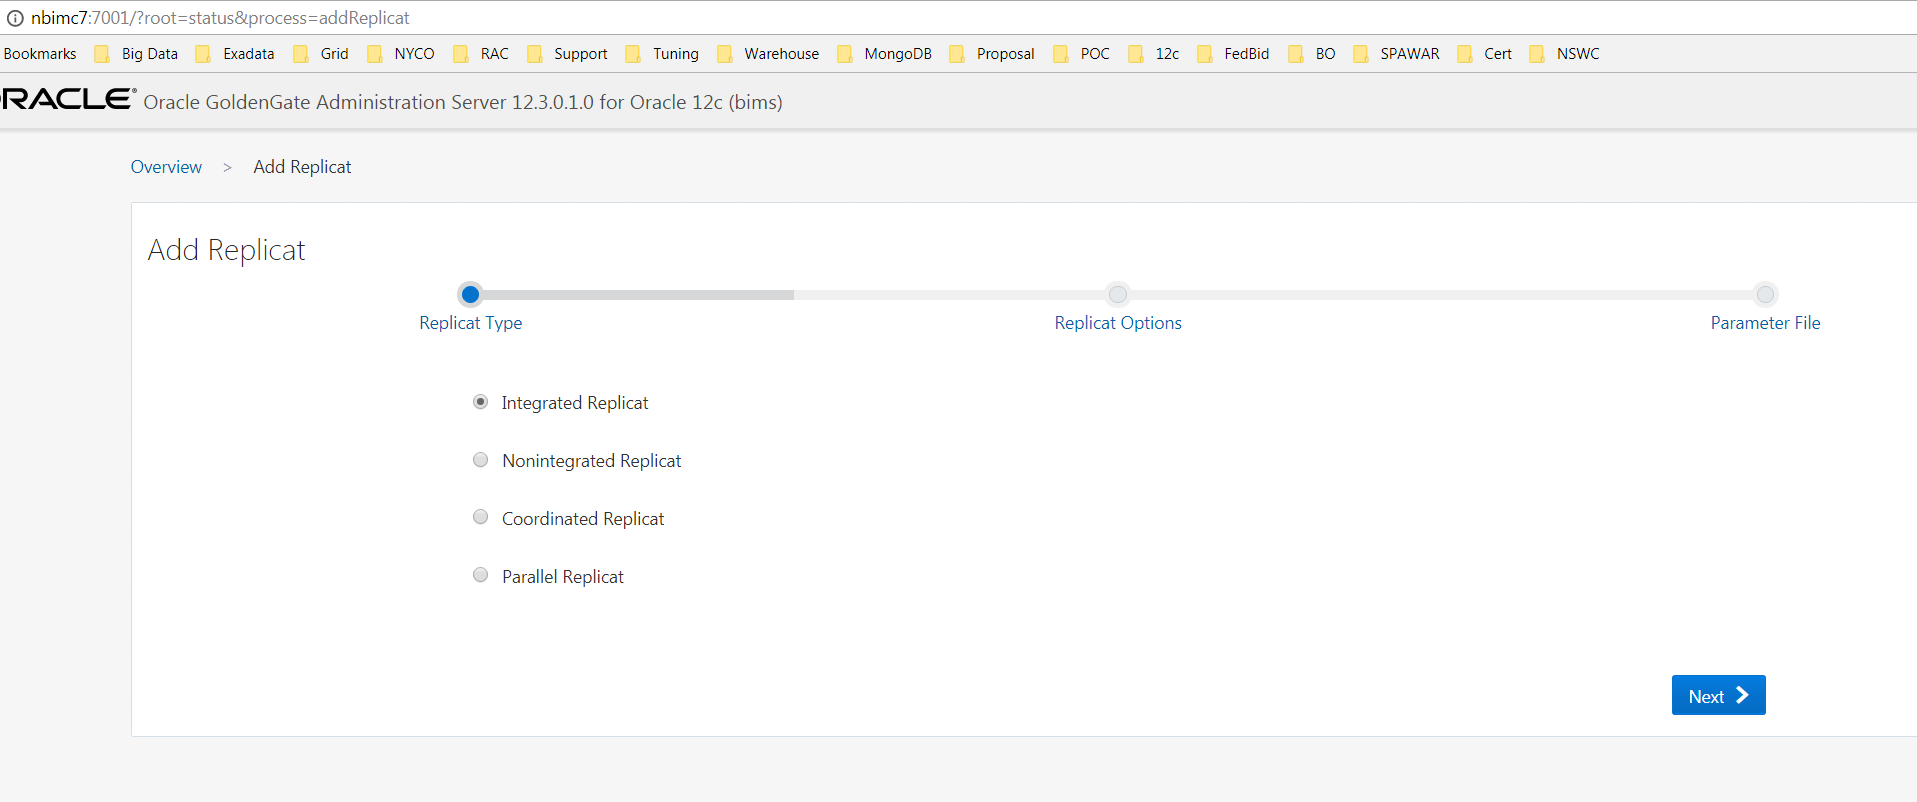
Click on Overview and select + to add Extracts.
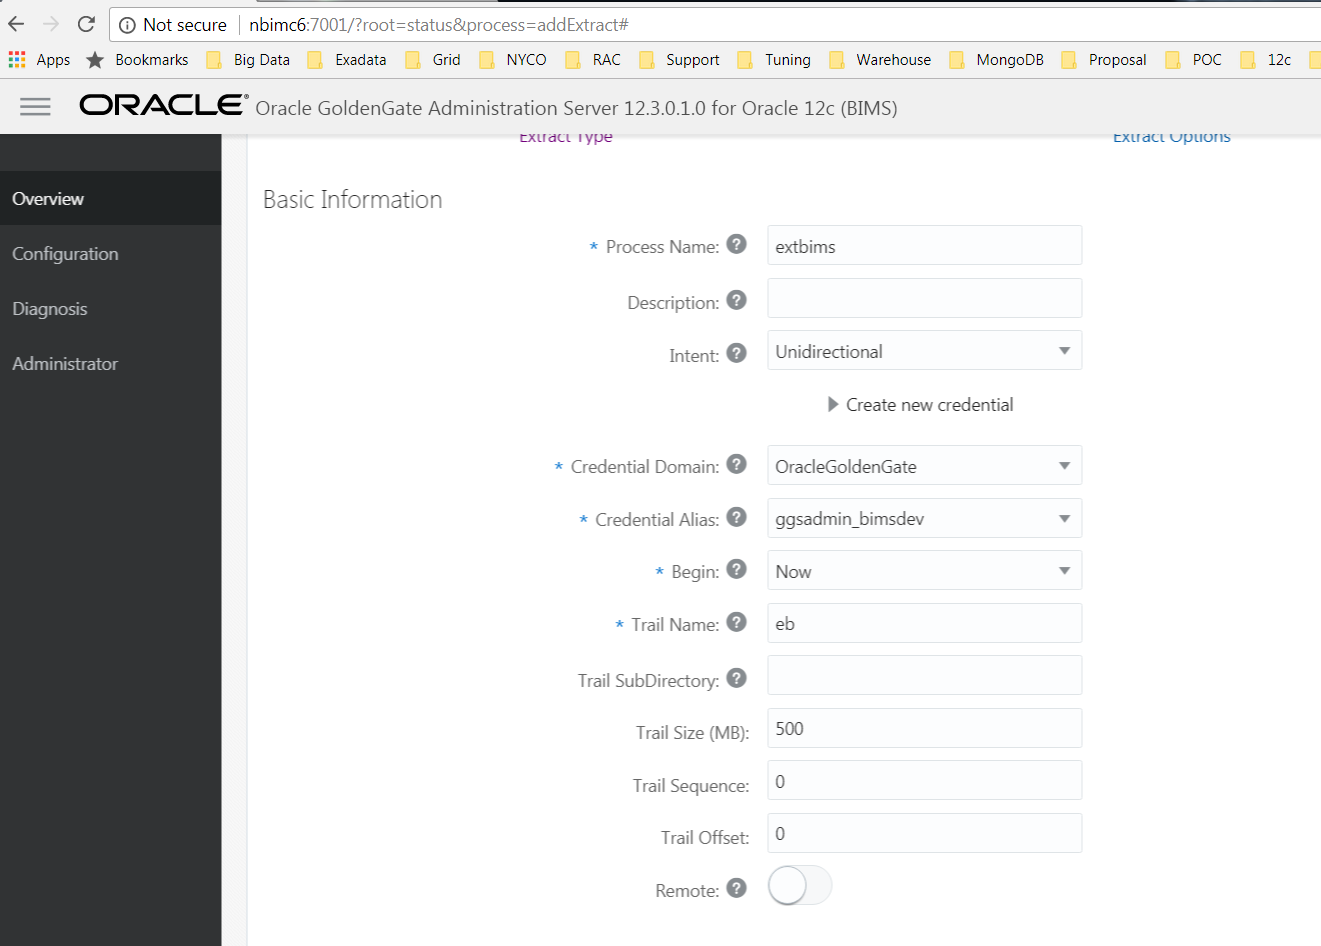
Select the below options. Once again, Integrated Extract was selected. Once this action completes, any changes will be captured by the Extract process.

You’ll need to provide Process name, Credential Domain, Credential Alias, and Trail Name. For everything else, going with the defaults should work fine.
Add table bims*; to end of the parameter file and click.
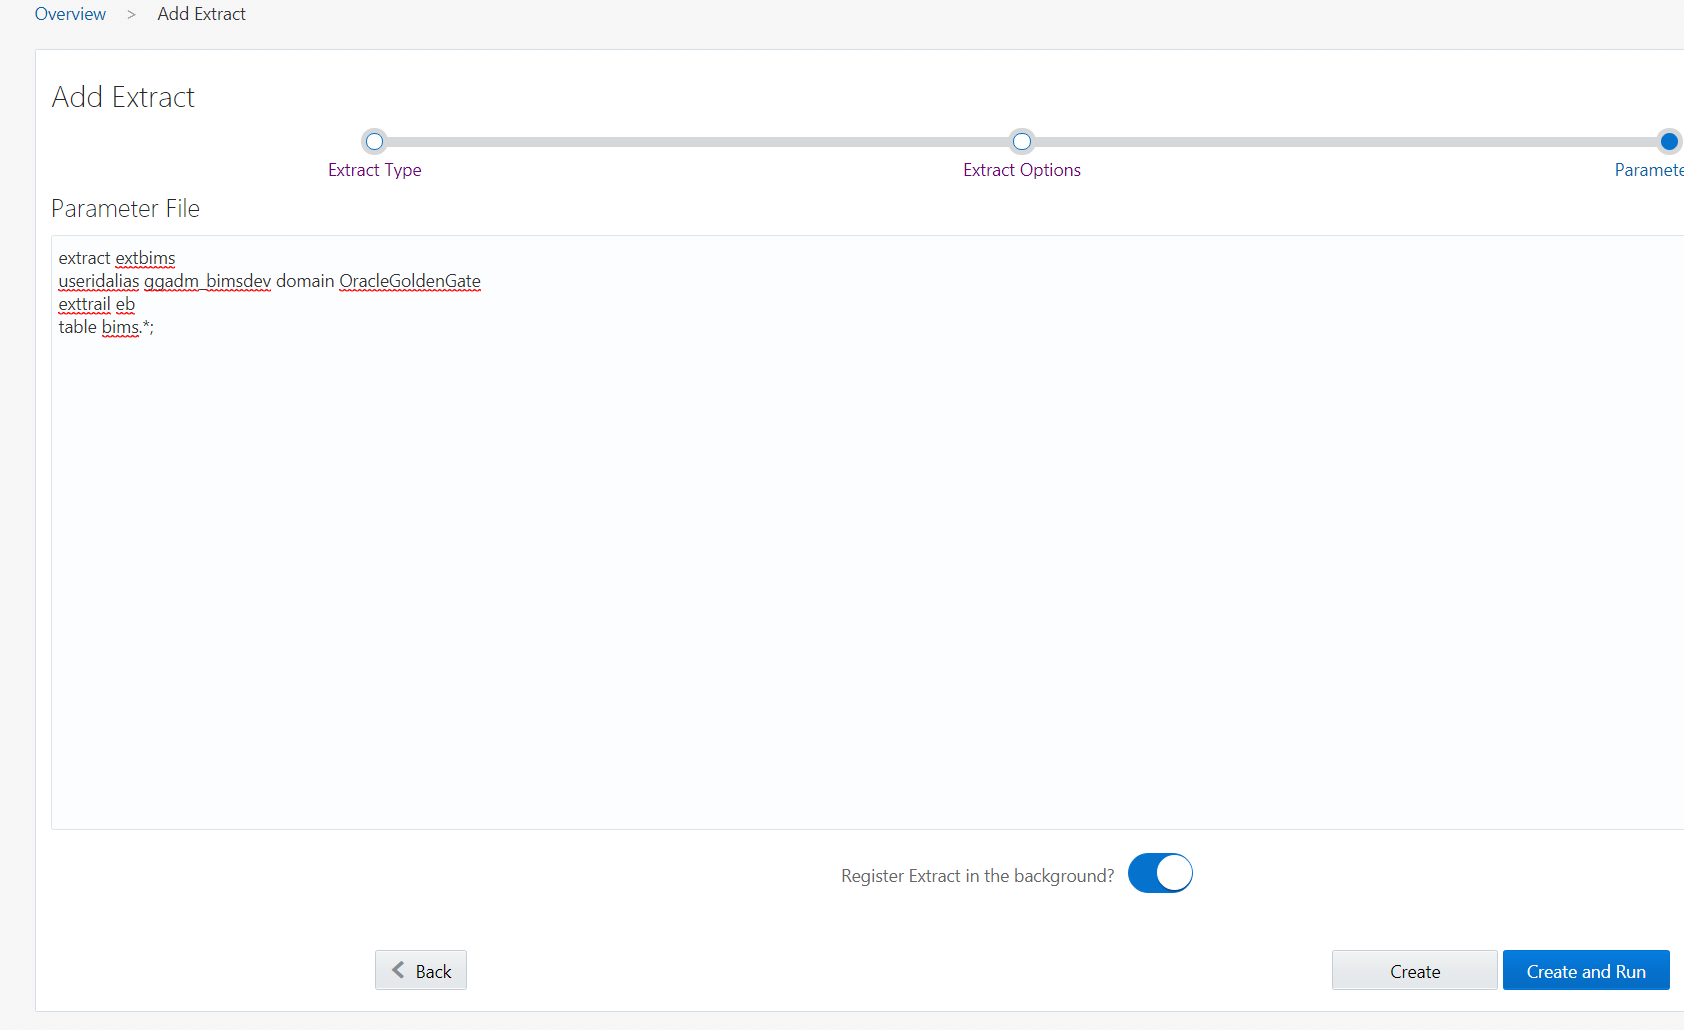
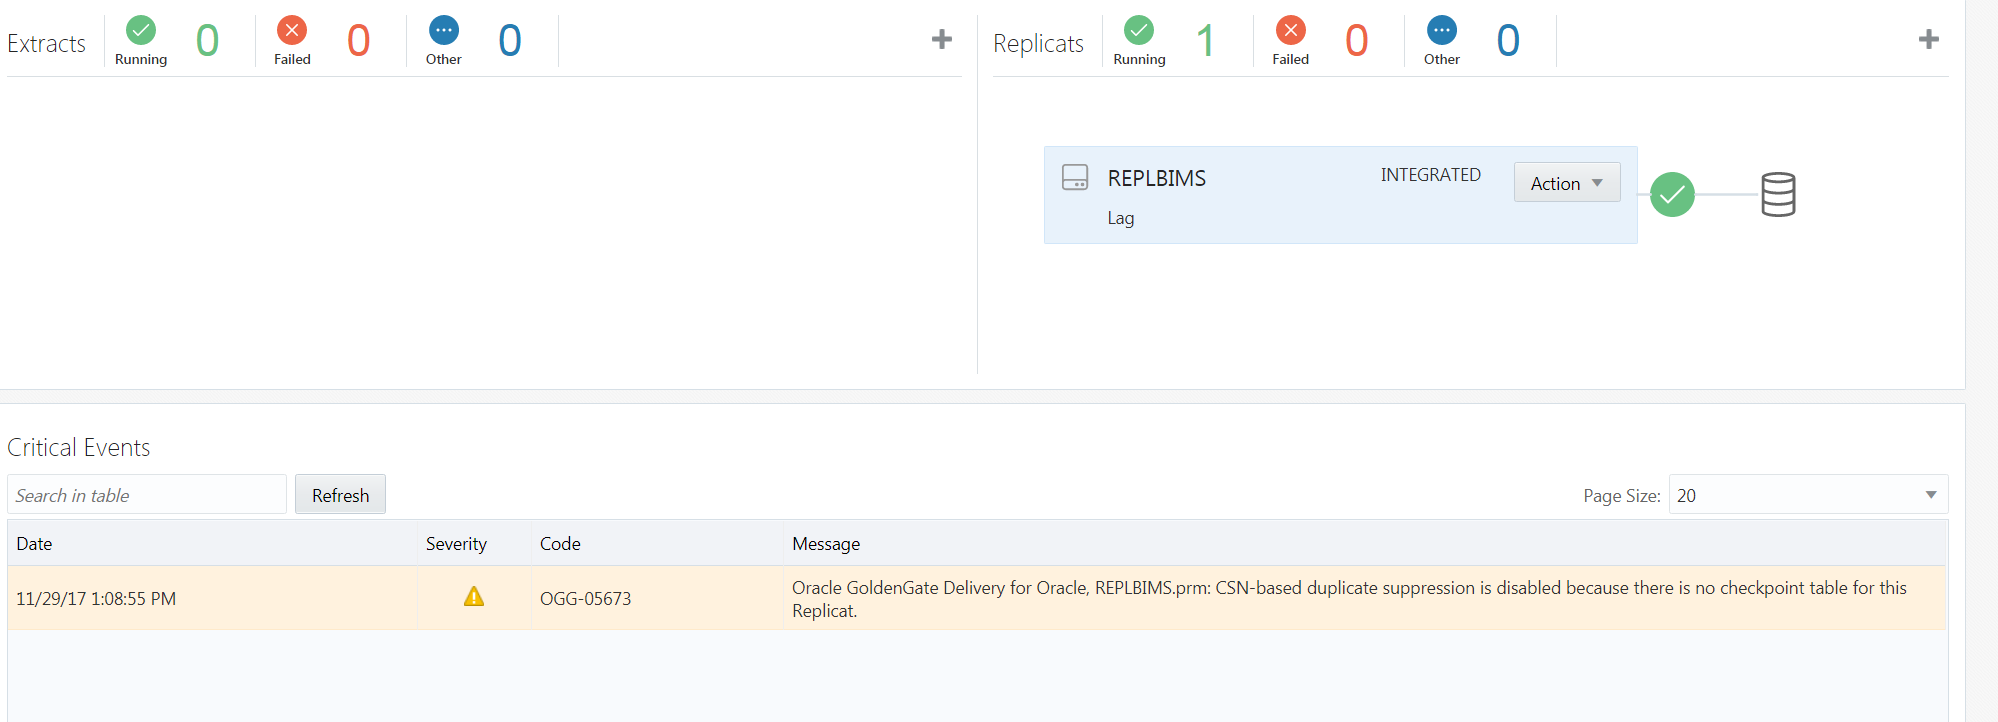
After clicking on Create and Run, the Extract is set up.
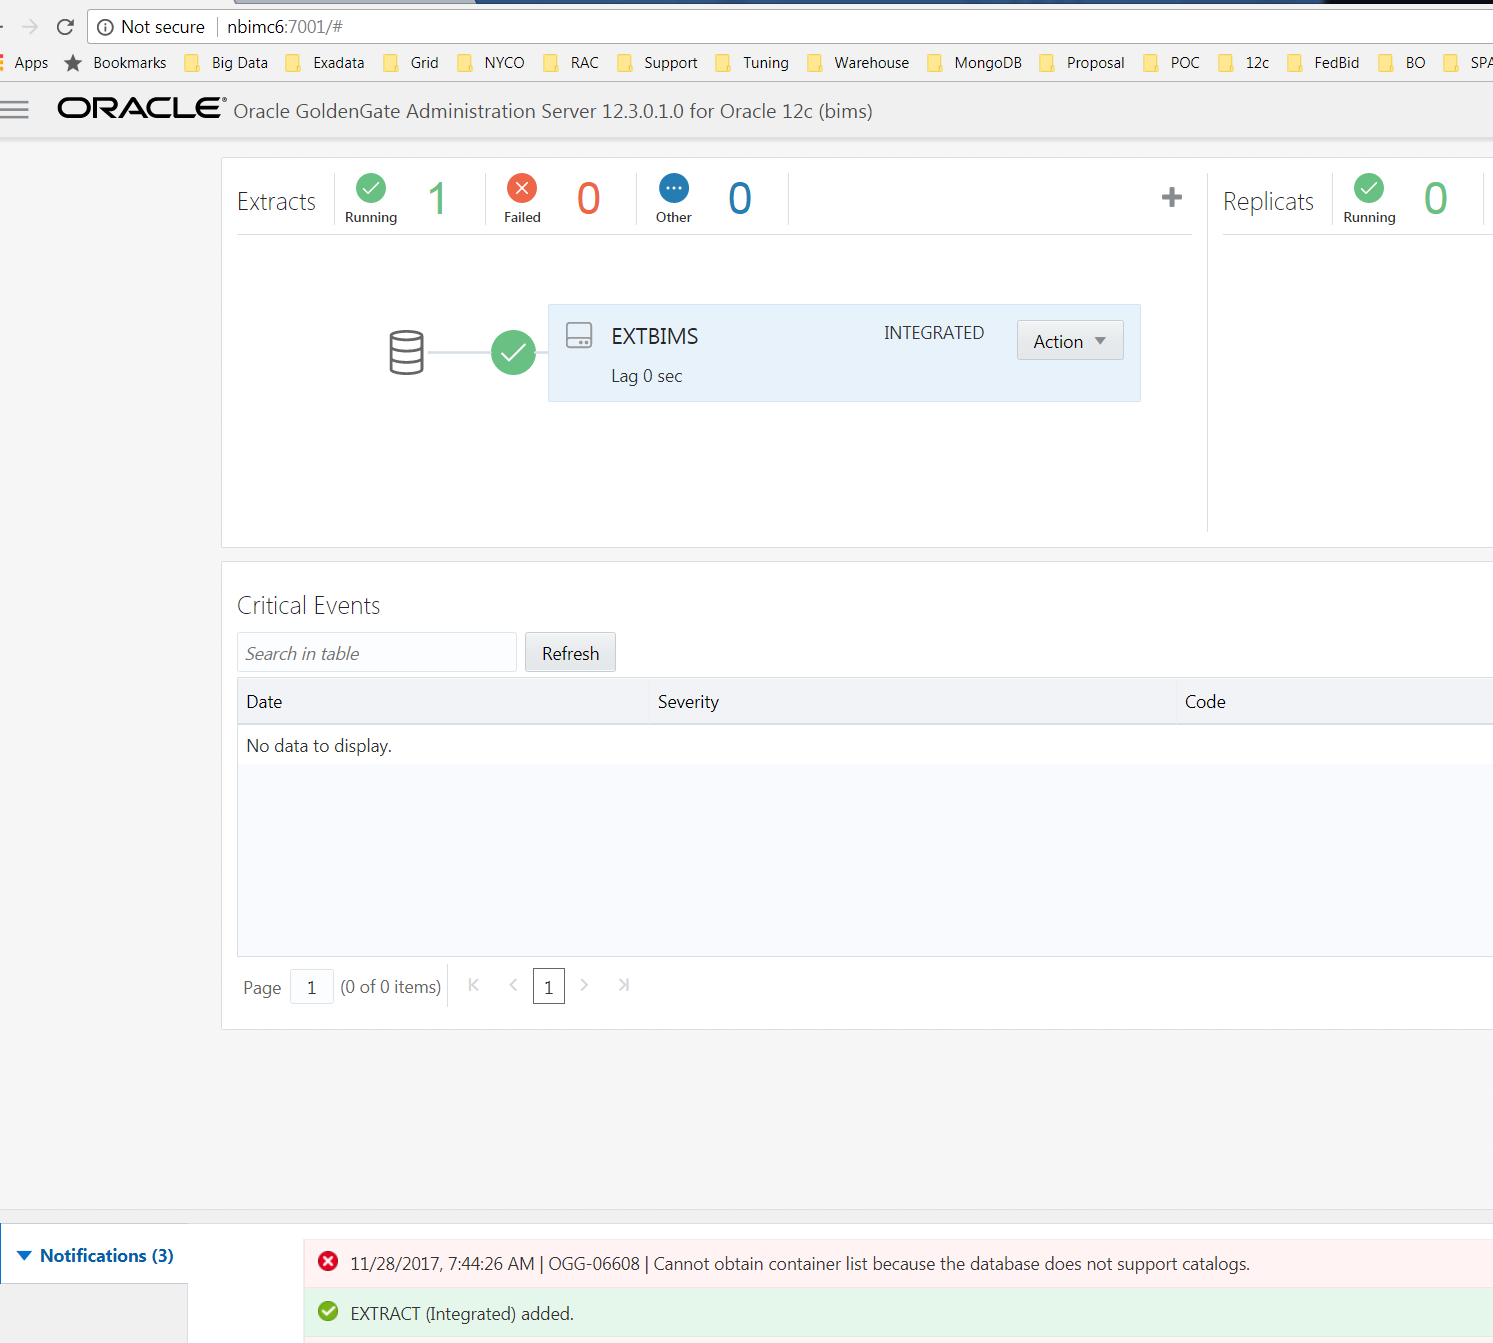
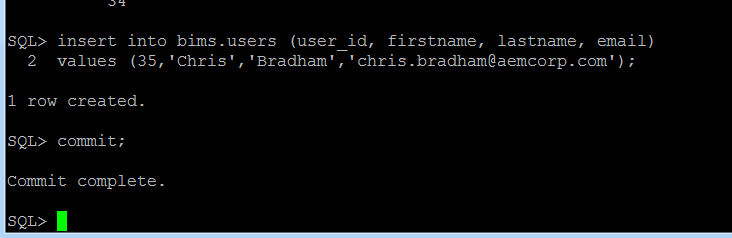
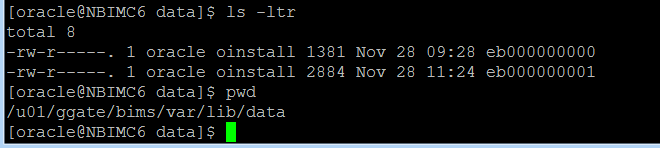
Insert a record into one of the source tables. You should notice a new trail file being generated.
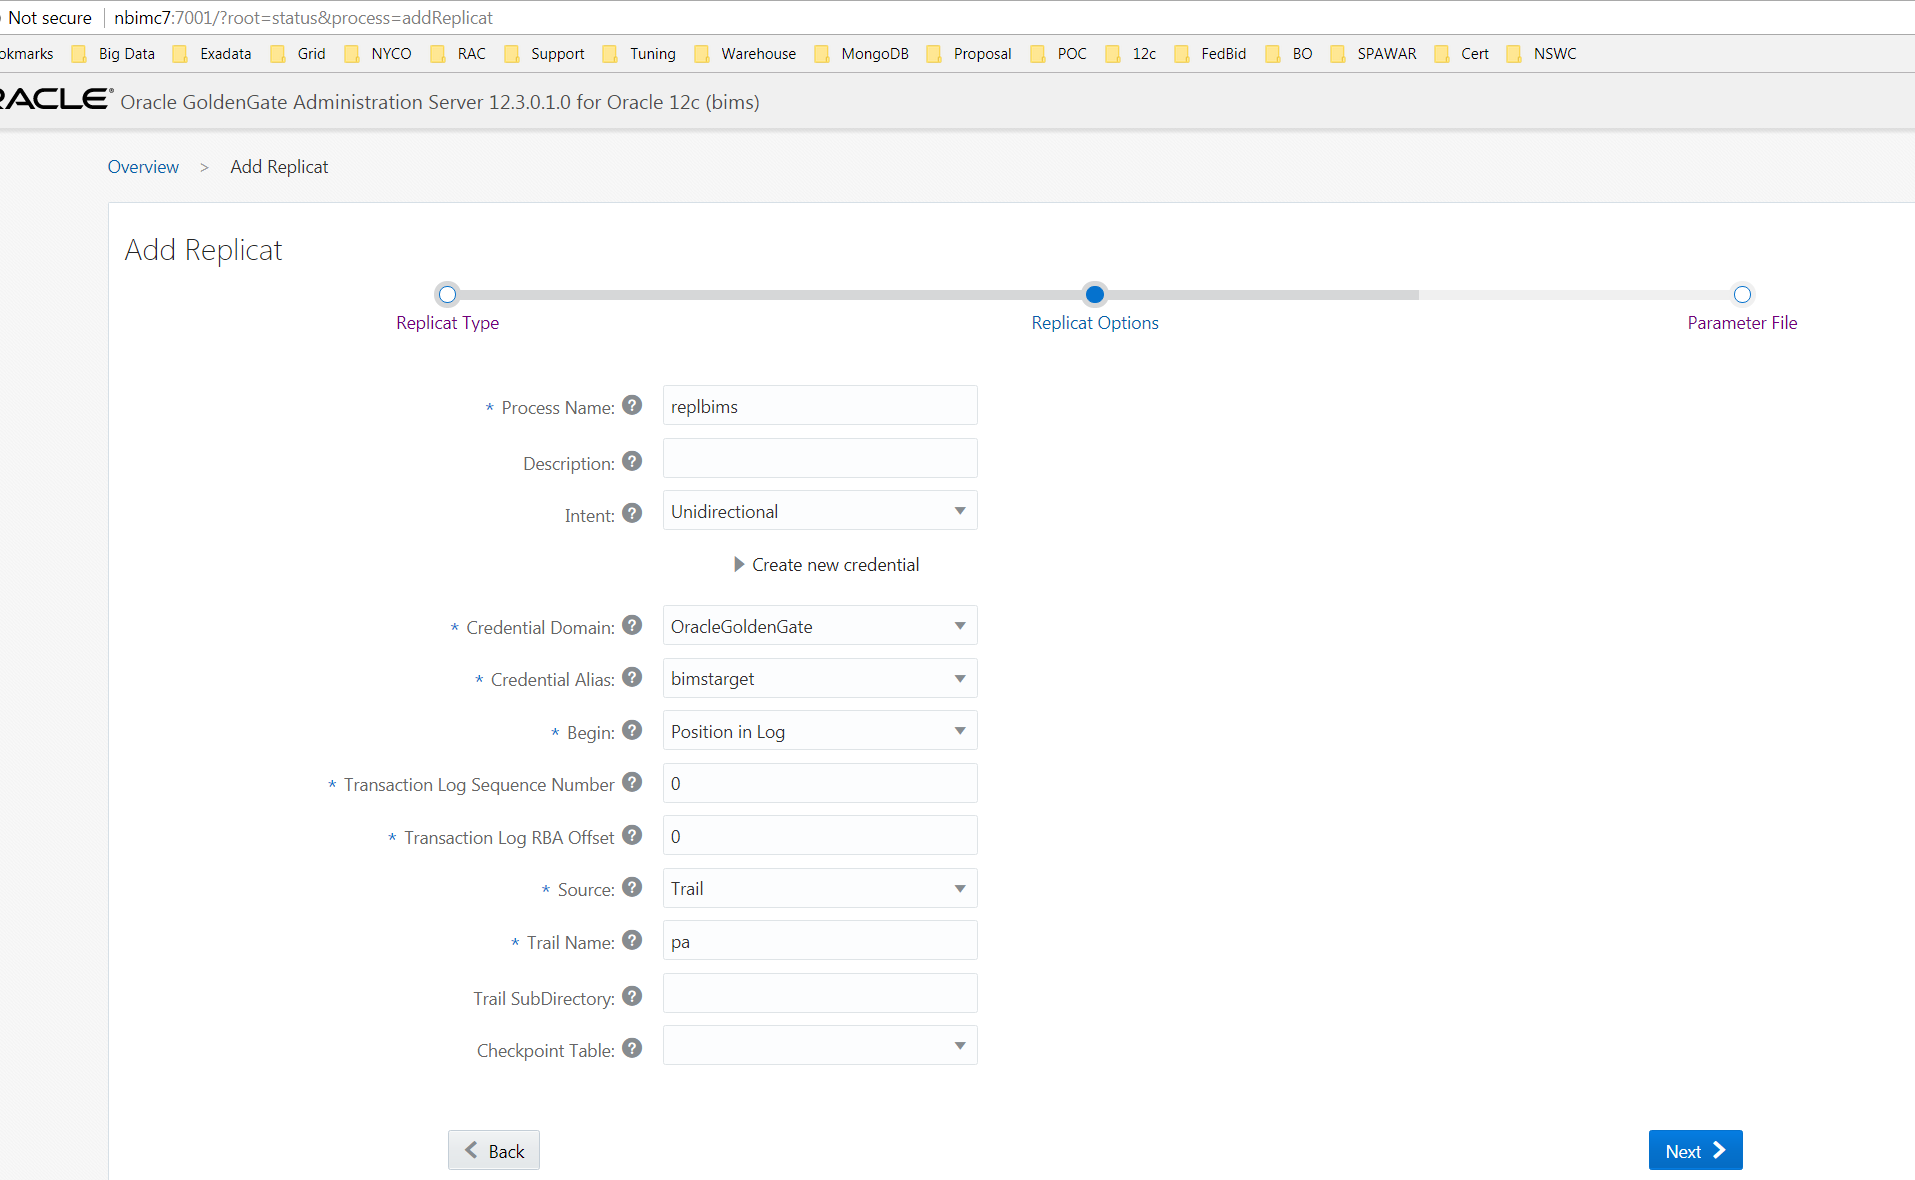
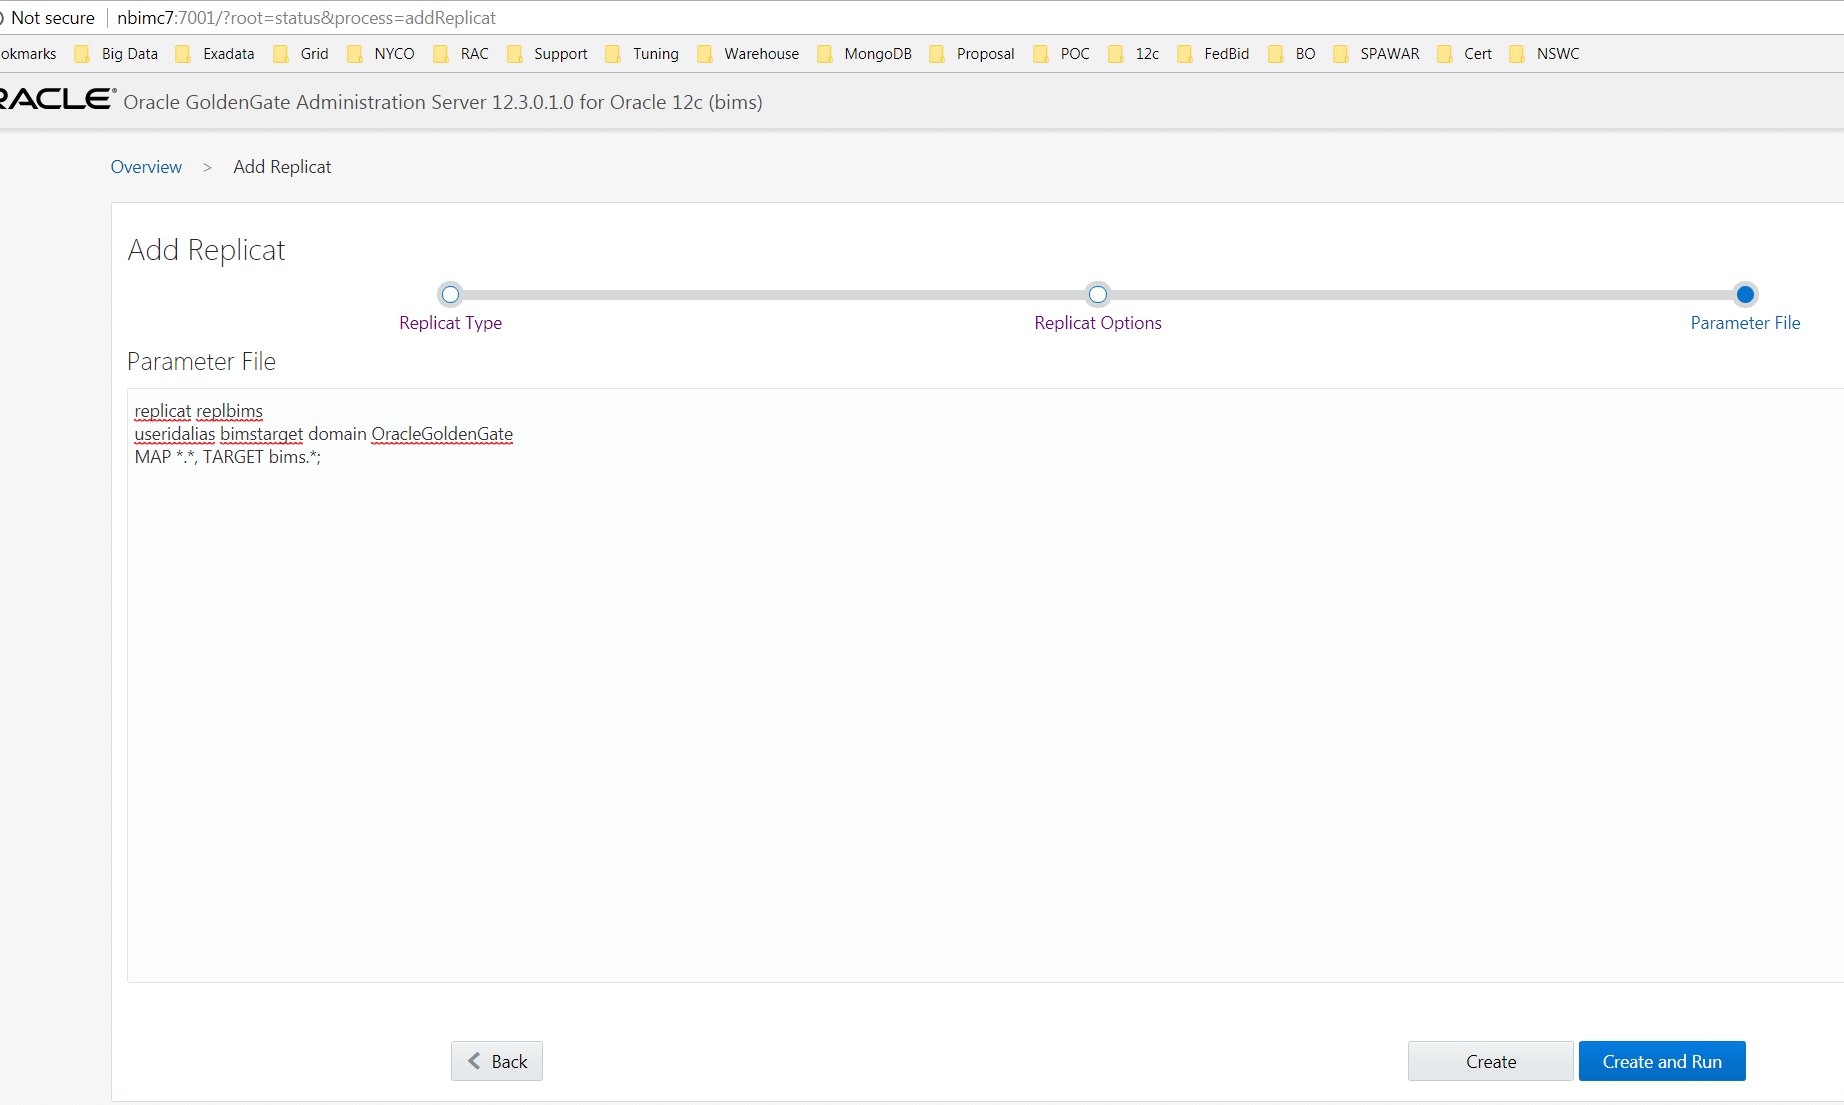
The next step is to add the replicat on the target. Log into target Administration Server on the target, click + sign for Replicat. Once again, the credential should have already been setup previously. If not, you’ll need to do this before you can proceed.

Enter the Process Name, Credential Domain, Credential Alias, and Trail Name. All other default entries should work.
Change target to bims.* otherwise the default will bring across all schemas, which still works. Personally, just prefer to know exactly what’s coming over.
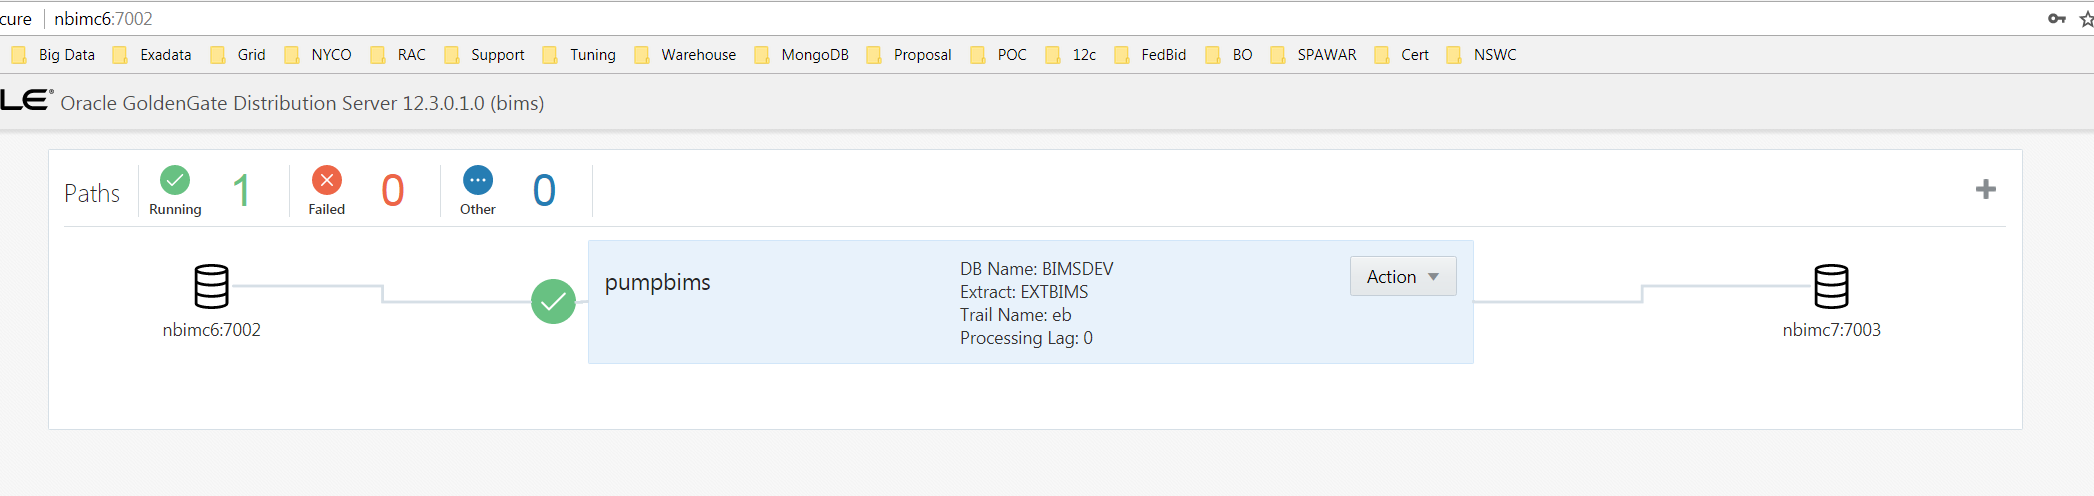
Next item, tie the replicat with the extract by configuring data pump on the source. Log in to the source Distribution Server (7002) and click the + sign to specify the appropriate information (below).

Notice the target is the receiver server’s info. Be sure to select the appropriate extract name.

Please note: The first time I attempted this and clicked on the Create and Run button, the DB Name and Extract did not show up on the status screen. I must have recreated this 20 times and never had it show with these entries or with the green checkbox. I even opened a SR for this because based on the examples I could find online, none showed any issues. For grins, I clicked on Action / Start and next thing you know I received the below screen. More to let you know to not be alarmed if you run into this issue and to provide you with the “fix."
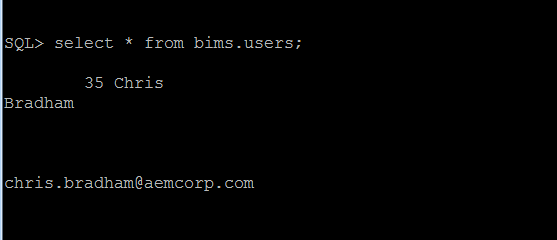
Finally, confirm the record made it over on the target!
It’s just that easy. :-) Now that the steps are documented, I would think this would only take an hour or two to complete this same exercise.
Interested in a different scenario? Anything clear as mud that needs more details? Let me know and I’ll update to ensure you have a much smoother experience than I did the first time I went through this exercise.