
Oracle Access Management (OAM) is Oracle’s solution for user management. The software is part of the Fusion Middleware Infrastructure family and can be integrated with both Oracle and non-Oracle software. OAM provides an enterprise-level platform that delivers user authentication and single sign-on (SSO) capabilities in a simple web-based console. Access Manager SSO allows for entities to access multiple applications after authentication and reduces the need for multiple logins.
In this blog, post we will go through the steps to install and configure the newest release of OAM (12.2.1.4) on Linux. In future posts, we will configure an SSO solution that utilizes Public Key Infrastructure (PKI) certificates or tokens with the Oracle Webgate.
There are four main steps that need to be completed when performing a clean installation of OAM:
1. Install Fusion Middleware
2. Install OAM Software
3. Configure the OAM Database Repository
4. Configure the OAM Domain
A pre-requisite for the install is that there is a database available that will be used as the repository for OAM and the Middleware Infrastructure. This must be in place before the repository and domain are created.
Please use this resource for additional information regarding requirements for the repository database.
Install Middleware Infrastructure
The first step of the OAM installation is to install Fusion Middleware (FMW) Infrastructure. This serves as the base layer of software used to manage FMW. The installation process creates the Oracle_Home directory and is straightforward and quick to run through.
1. Unzip the software:

2. Start the installer:

3. Select the inventory directory:
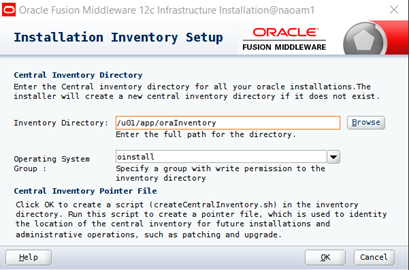
4. As root, run the createCentralInventory.sh script that is in the inventory directory location.

5. Select Skip Auto Updates
6. Select Oracle_Home location
7. Installation type is Fusion Middleware Infrastructure
8. Click Next after Pre-requisite checks complete
9. Click Install
10. Click Next and then Finish to exit the installer
Install OAM Software
The next step in the process is to install the OAM software. Much like the Fusion Middleware installation, this is a quick process with the default options typically selected.
1. Unzip the OAM software:

2. Start the OAM Install:

3. Welcome Screen – Click Next
4. Auto Updates – Click Skip Auto Updates and then Next
5. Installation Location – Same location as where the Fusion Middleware was installed
6. Installation Type is Collocated:
7. Prerequisite Checks – Click Next
8. Installation Summary – Click Install
9. Installation Progress – Click Next
10.Installation Complete – Click Finish
Configuring OAM - Repository
Part three of the installation involves creating the repository database. Oracle includes a utility that installs the required schemas based on the selected components. In this scenario, a separate Oracle database has been created on another server, and port 1521 has been opened for communication between the two servers. It is recommended to set the following parameters: OPEN_CURSORS = 800, and PROCESSES = 1000 (or greater).
1. Run the Repository Creation Utility

2. Welcome Screen – Click Next
3. Create Repository Screen – Accept Defaults – Create Repository and System Load and Product Load
4. Enter Database Connection details
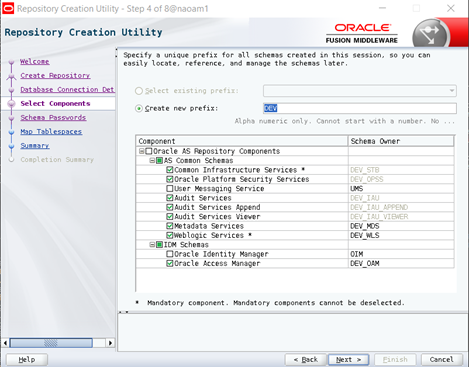
5. Select “Oracle Access Manager” as the component and any dependencies will automatically get selected:
6. Schema Passwords – Enter password that will be used for the schemas, this can be the same password for all schemas or individual passwords can be set up
7. Map Tablespaces – Click Next
8. Click OK to create new tablespaces.
9. Summary – Click Create
10. Completion Summary – Verify that all components are a success
Configuring OAM – Domain
The final step of the installation process is to create and configure the domain that OAM will use. The domain is where all configuration and program files will be located. This process is what installs the OAM-specific software. In this final step, we will create/configure the domain and then start up all the required servers.
1. Run the config.sh script from $middleware_home/oracle_common/common/bin:

2. Create Domain – Create a New Domain and select location
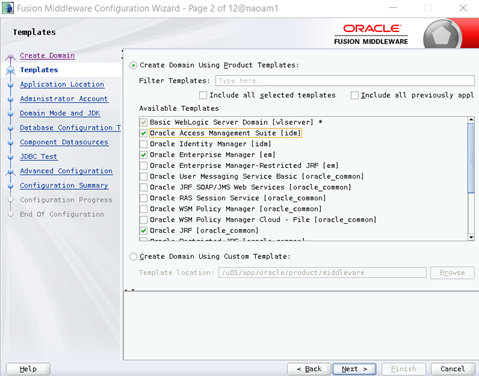
3. Templates – Select Oracle Access Management Suite, any dependencies will automatically be selected as well
4. Application Location – Keep default and click Next
5. Administrator Account – Create and confirm password for weblogic user
6. Domain Mode and JDK – Select Production and keep default of Oracle Hotspot
7. Database Configuration – Enter details for database connection and click Get RCU Configuration, if test is successful click Next
8. Component Datasources – Leave default and click Next
9. JDBC Test – Verify that all connections are successful and click Next
10. Advanced Configuration – Make the selections shown below and click Next:

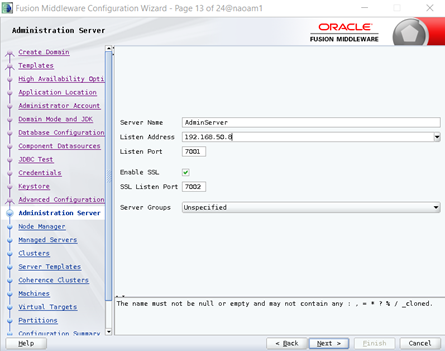
11. Administration Server – Select the IP address of the host machine (it should appear in the drop-down) and enable SSL:
12. Node Manager – Select Domain Default Location and enter in the weblogic user credentials
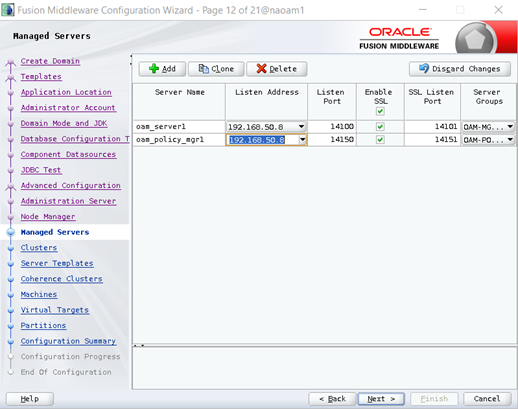
13. Managed Servers – Update listen address and enable SSL port:
14. Clusters – Click Next
15. Server Templates – Click Next
16. Coherence Clusters – Keep defaults and click Next
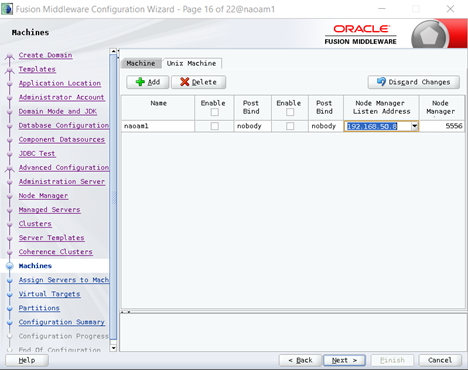
17. Machines – Select Unix Machine and Add. Enter details below:
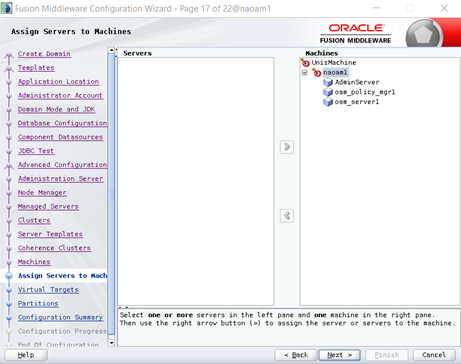
18. Assign Servers to Machine – Select servers on left pane, and move them over to the newly created machine:
19. Virtual Targets– Select Next
20. Partitions – Select Next
21. Configuration Summary – Click Create
22. Configuration Progress – Click Next
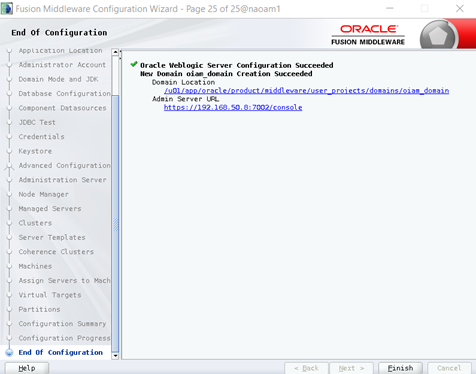
23. End Of Configuration – Make note of the Domain Location and Admin Server URL
24. Start Servers:

25. Access the Admin Server URL
26. Start OAM Servers- Weblogic Domain Menu -> Control -> Startup:
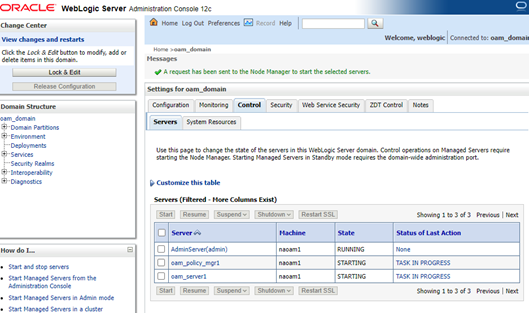
27. Test Installation with weblogic username/password:

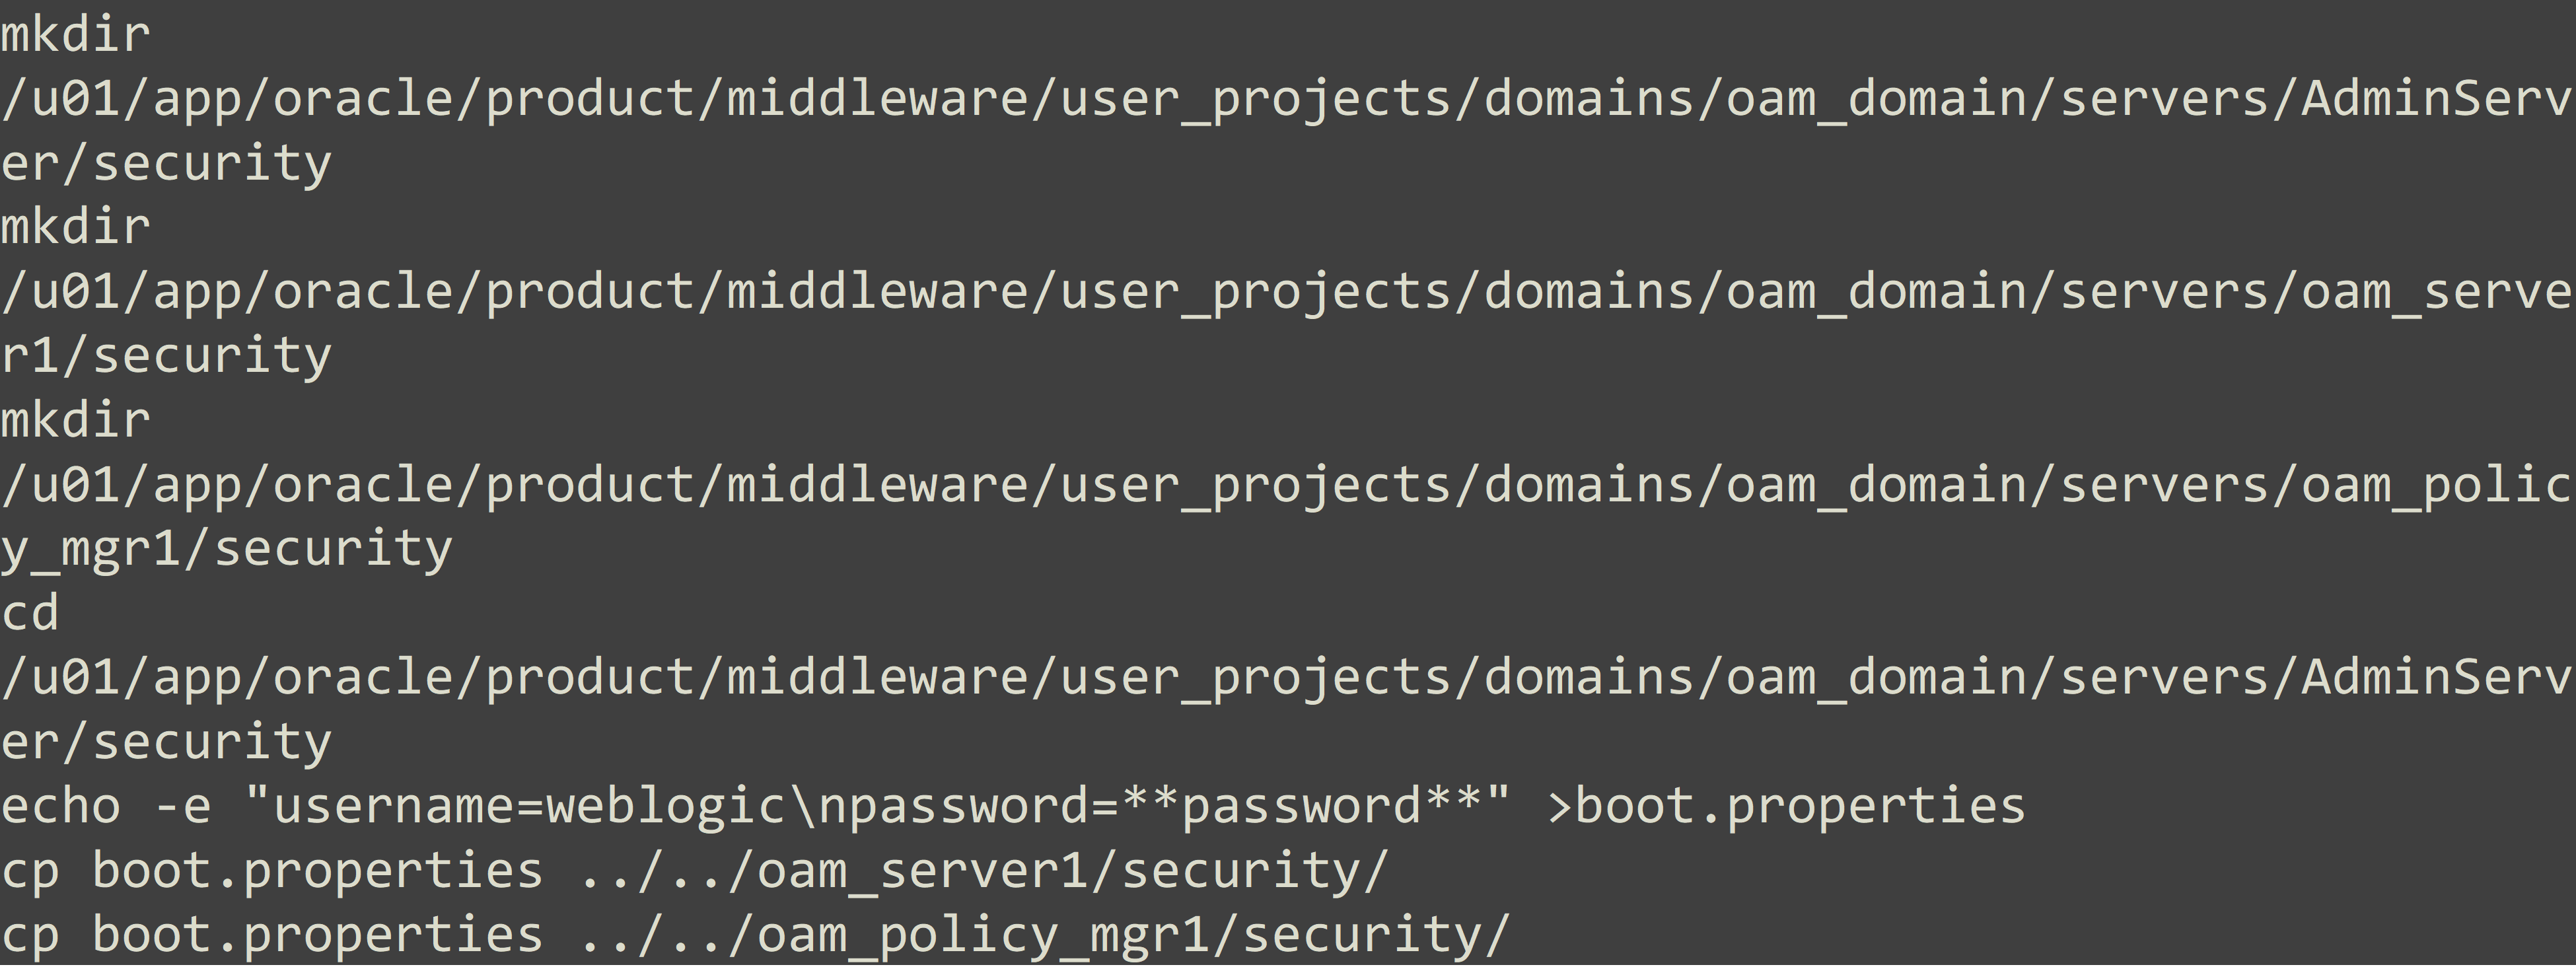
28. Configure boot.properties to prevent entering weblogic username/password on startup:
29. Restart servers with nohup, this will allow you to start the applications in the background and not require a dedicated session to the server:

Now that OAM has been installed and running, the next step is configuring SSO to use PKI authentication for end-users. In an upcoming blog post, we will dive into detail on how to set this up and the steps involved.
In the meantime, if you have any questions about how to implement or install OAM please reach out to AEM to learn more about our capabilities and services.