
Perhaps you want to add some new indexes but are too scared to try because you don’t want an angry mob showing up at your desk the minute it’s implemented in production?
Oracle Real Application Testing (RAT) was designed to empower DBAs to make proactive changes while knowing exactly what to expect when a change is implemented. It greatly minimizes the likelihood of any negative repercussions.
Oracle RAT is comprised of two primary components. The first component is called Database Replay. This tool allows you to capture and replay workloads from production into another environment. You simply capture the workload, transfer the files to a test environment, and then replay the activity which was originally performed by your actual users. This blog post will focus on the Database Replay process.
The other component is called SQL Performance Analyzer and it allows you to assess the impact of the load on your test system through detailed analysis. For example, if you want to increase SGA in production, you could first make the update in your test environment and use the production load to see if there’s any value in doing this without trial and error in a production system. Other use cases include upgrading database versions, consolidating schemas into a single database, introducing new hardware, and more.
Now that you know the purpose of Oracle RAT, let’s take a look at the steps required to give it a try. Before you start, please review Oracle MOS note 1535885.1 which contains best practices for implementing this tool. Please keep in mind that Oracle RAT is a licensed software product. If you do not currently have it, you will need to get in touch with your friendly neighborhood Oracle Sales Rep for pricing.
For this example, we are using an Oracle 12.2 Database on Linux with Oracle Enterprise Manager (OEM) 13c. We have one container with one pluggable database and we will be performing all the work at the container level. If you have multiple pluggable databases in a container, you’ll probably want to limit your capture at the appropriate place. More on this is coming up so stay tuned.
OEM was used for the capture since the process is very straightforward. For the database replay, I used sqlplus commands because executing the commands through OEM did not work well. I suspect the container/pluggable piece was the source of the issue but once you see the commands required, they are fairly simple and straightforward anyway.
Getting started
To start, you will need to ensure Oracle RAT is enabled on the database. This is a simple command but it requires that all databases to be down. Once the databases are down, execute the Linux command “chopt enable rat” on each database server involved (source/target). It is enabled by default so unless you intentionally disabled RAT, you can most likely skip this step.
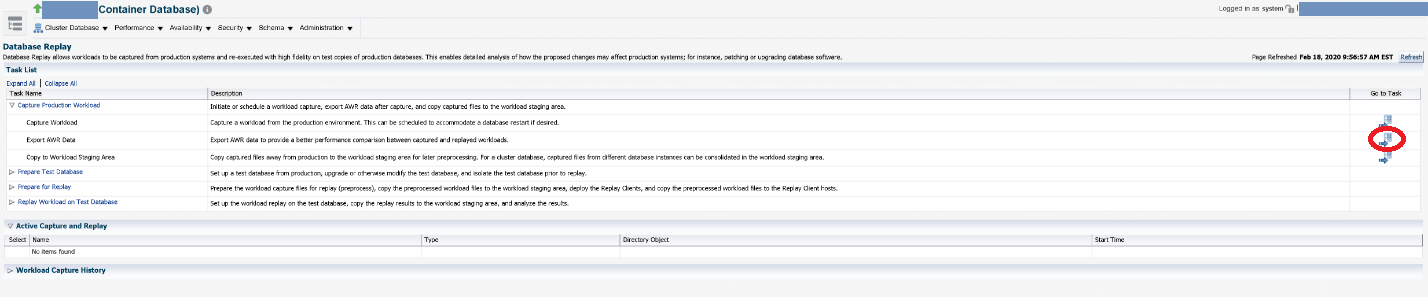
Next, you will need to connect to OEM and select the source database (production). From the Database Home screen, select Performance and Database Replay.
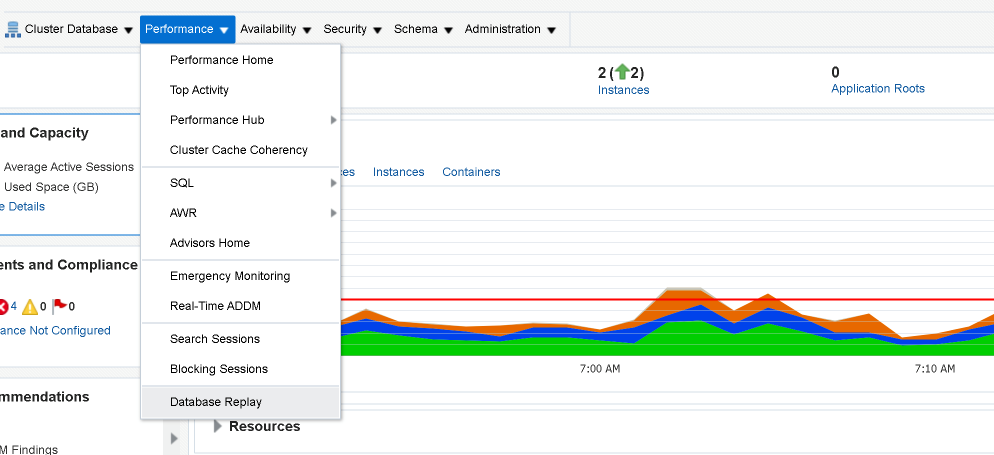
Once selected, you will see the below options. You’ll want to expand the Capture Production Workload Task and go to the Capture Workload task (far right of the screen, circled in red).
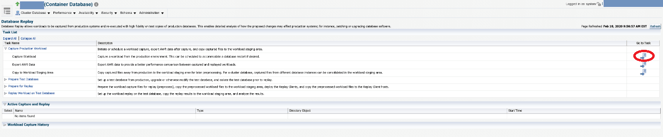
Once you’ve clicked the task, you will be taken to a wizard that will walk you through the process. Please note on this screen, you will want to have your test database mirror production in both structure and data. How easy/feasible this may be varies by system. After acknowledging the prerequisites, click next.

With Database Replay, you have the option of restarting the database prior to the capture. By restarting the database, this will allow for a “cleaner” run to avoid missing dependent transactions. In addition, on this screen you can exclude/include one or more pluggable databases, specific instances if using Oracle RAC, or other criteria to limit what’s being captured. After specifying what’s appropriate for your situation, click Next to continue.
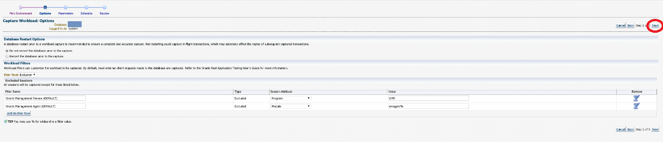
You will need to specify a directory location to put all the capture files. It would be best to create a new, empty directory to avoid copying any unnecessary extra baggage across to your test environment. Once specified, click Next.

Running the capture
There are two options for running the capture: either run it immediately or schedule it in the form of a job. In addition, you’ll want to specify how long you want the capture to run. Best practices dictate that for the first run you should choose a duration of one hour. Once you’ve gone through this process, you can shoot for longer durations. You will need to provide Host Credentials to a user that has access to the directory created in the previous step. Click Next to continue.
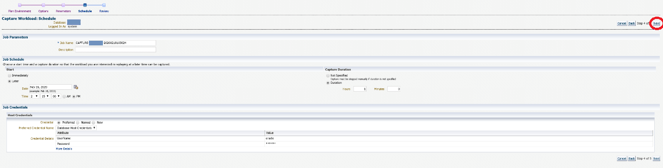
The last item provides a review for the options selected. If you are good with your selections, click Submit.

If you chose to schedule it later, you will see on the upper left side of your screen the option to view the job. Click on it and you will see your job is scheduled to run.

Exporting the AWR data
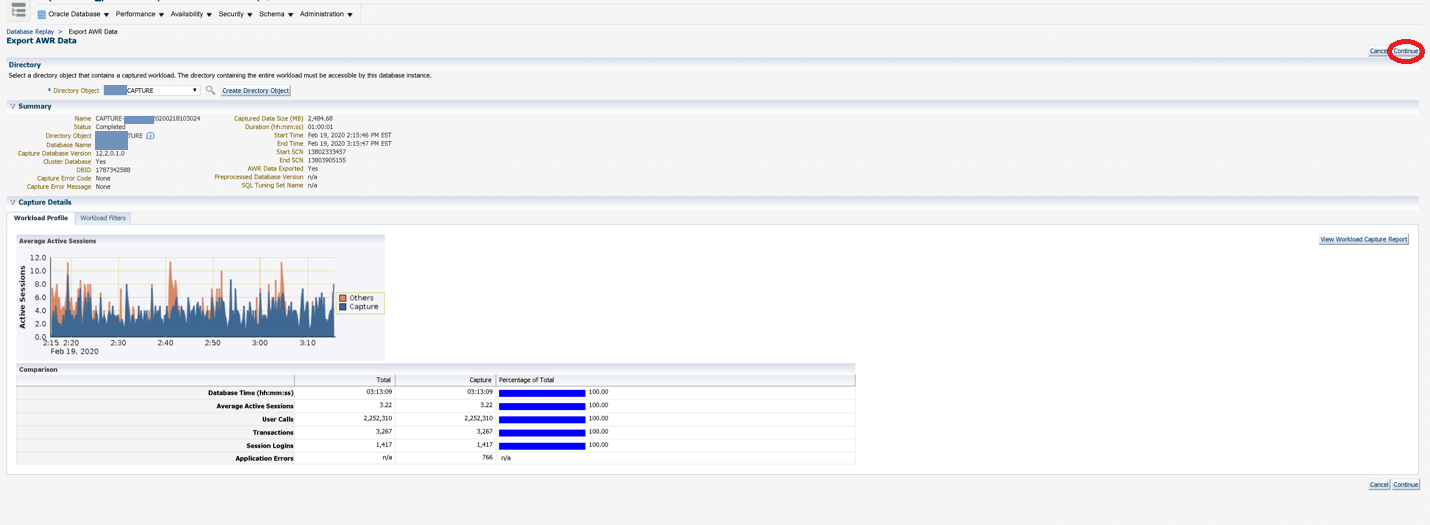
Once the job completes, go back to the Database Replay menu, expand the Capture Production Workload Task and click on the Export AWR Data on the right side of the screen.
You’ll want to export the AWR data from production to serve as a comparison for the target. Specify the same directory location previously specified for the capture to keep all of the capture related information together. Click Continue after selecting the directory location.

You will be prompted to confirm if you want to export the AWR data. Click Yes to continue.

A summary screen displays exactly what the activity looks like during the capture. Click Continue to proceed.
A job will then be initiated to export the AWR results. This may take a while to run so just wait for the job to complete.

Once the AWR data has been exported, you have two options. You can either use OEM to copy the staging area (capture and AWR data) to the target/test environment or you can do this manually. If both of your environments are managed through the same OEM interface, then using OEM will be the easiest path. Otherwise, you can tar the directory contents, copy the tar file to the test server, and untar into a directory.
Replaying your capture
Now it’s time to move to the replay portion where the majority of the remaining work will be performed via the command line. The first step is to back up the test database. The easiest way to accomplish this, not only from a backup but from a restore perspective, is to use flashback database. Below is the command syntax for a container/pluggable when you connect at the container level.
create restore point pre_rat FOR PLUGGABLE DATABASE <pluggable> guarantee flashback database;
After you issue this command, you can move forward with replaying the database without fear. Based on experience working with support, I also suggest disabling Tuning Advisor. If you choose not to do this or forget to run this command, your replay for a one-hour capture may take longer than SIX hours to replay back. This is probably not an optional step (at least based on my experience).
BEGIN DBMS_AUTO_TASK_ADMIN.DISABLE(
client_name => 'sql tuning advisor',
operation => NULL,
window_name => NULL);
END;
/
To start the replay process, first you need to pre-process and initialize the workload. To do so, run the below commands. You’ll first need to create a directory in the database through sqlplus where the capture files are stored:
create directory replay as '/<path>/replay';
The directory specified here will be referenced with the subsequent commands. The process_capture procedure creates a workload replay set of metadata files used for the replay. You’ll specify the directory you just created. This can take a while to run so be patient:
EXEC DBMS_WORKLOAD_REPLAY.PROCESS_CAPTURE('REPLAY');
You’ll then need to initialize the replay by providing the replay name and directory you previously created accordingly with the below command:
exec DBMS_WORKLOAD_REPLAY.INITIALIZE_REPLAY(replay_name => 'REPLAY', replay_dir => 'REPLAY');
You should run the below query to make sure the replay is in an initialized status. Otherwise, you can’t move forward:
select id, name, status from dba_workload_replays;
This next step is very important for pluggable database and it’s a command you won’t find in many places. If this step isn’t completed, you can expect to see a large number of errors with a replay that provides little value. You will need to remap connections from the capture to point to the replay. You will also need to specify the replay name, host, and database service name information following the below:
begin
for i in (select conn_id, capture_conn
from dba_workload_connection_map m, dba_workload_replays r
where replay_id = id
and name = '<replay name>')
loop
dbms_workload_replay.remap_connection(connection_id=>i.conn_id, replay_connection=>'(DESCRIPTION=(ADDRESS=(PROTOCOL=TCP)(HOST=<host>)(PORT=1521))(CONNECT_DATA=(SERVER=DEDICATED)(SERVICE_NAME=<service_name>)))');
end loop;
commit;
end;
/
Next, you need to put the database in prepare mode by issuing the below command. This command takes a while to run so be patient:
exec dbms_workload_replay.prepare_replay(synchronization=>FALSE);
Next, the replay clients need to be configured. To determine the number of clients necessary to process your load, specify the calibrate option and review the results. Be sure to run this command from the directory where your capture is loaded. Otherwise, you’ll need to specify the directory as part of the command:
[oracle@xxx capture]$ $ORACLE_HOME/bin/wrc mode=calibrate
Workload Replay Client: Release 12.2.0.1.0 - Production on Fri Mar 6 08:32:17 2020
Copyright (c) 1982, 2017, Oracle and/or its affiliates. All rights reserved.
Report for Workload in: .
-----------------------
Recommendation:
Consider using at least 3 clients divided among 1 CPU(s)
You will need at least 352 MB of memory per client process.
If your machine(s) cannot match that number, consider using more clients.
Workload Characteristics:
- max concurrency: 281 sessions
- total number of sessions: 1288
Assumptions:
- 1 client process per 100 concurrent sessions
- 4 client processes per CPU
- 256 KB of memory cache per concurrent session
- think time scale = 100
- connect time scale = 100
- synchronization = TRUE
In reviewing the above results, it indicates at least three clients should be started prior to executing the replay. I can tell you based on personal experience that if you just launch one client, the replay could take over twice as long as it should. It’s wise to follow the recommended number of clients. Next, open a new ssh session for each of the clients required. On each, you will need to run the below from the capture directory:
wrc system/<password>@<container> mode=replay replaydir=/<mount point>/replay
Workload Replay Client: Release 12.2.0.1.0 - Production on Wed Mar 18 14:59:14 2020
Copyright (c) 1982, 2017, Oracle and/or its affiliates. All rights reserved.
Wait for the replay to start (14:59:14)
Next from a separate ssh session, run the below command in sqlplus to start the replay:
exec DBMS_WORKLOAD_REPLAY.START_REPLAY;
The replay clients will display activity and/or potential error messages. In my case, I saw numerous messages like the below.
(wrc_r00444_59507.trc) ORA-15568: login of user <user> during workload replay failed with ORA-1435
If you have login triggers enabled, your production passwords do not match with your test environment, or if you do not remap the connections as illustrated previously, you may receive these type of messages. Otherwise, it should look like the below from the wrc client window:
wrc system/"xxx"@<container> mode=replay replaydir=/<mount point>/replay
Workload Replay Client: Release 12.2.0.1.0 - Production on Fri Mar 20 08:32:08 2020
Copyright (c) 1982, 2017, Oracle and/or its affiliates. All rights reserved.
Wait for the replay to start (08:32:08)
Replay client 1 started (08:33:34)
Viewing progress
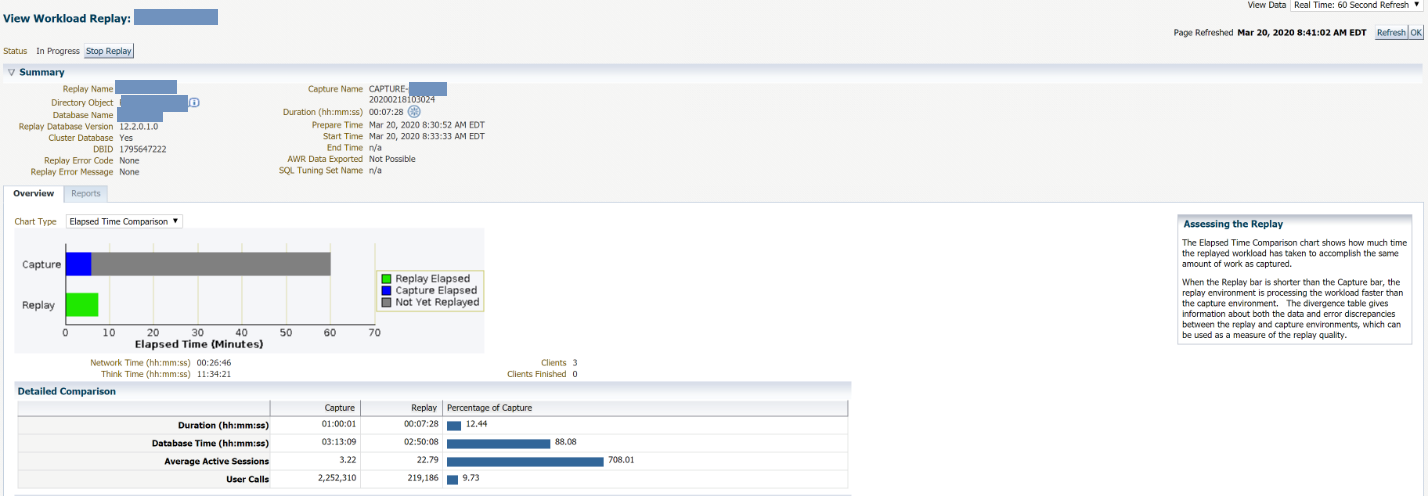
While the replay is being applied we can circle back to OEM to watch the progress and see how things are looking from a GUI perspective based on the elapsed time.
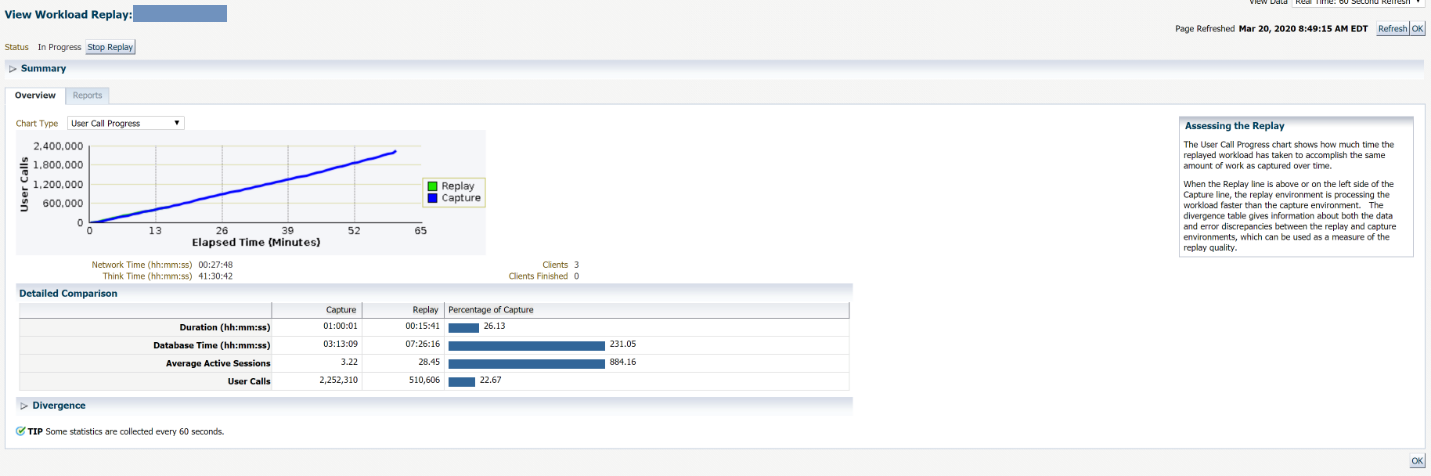
Below is another view showing progress on the replay based on the user calls:
Once the replay completes, the replay clients will return back to Unix prompts, such as below:
Wait for the replay to start (13:25:16)
Replay client 1 started (13:25:34)
(wrc_r00252_367477.trc) ORA-15558: replay thread encountered unexpected error
(wrc_r00288_367477.trc) ORA-15558: replay thread encountered unexpected error
(wrc_r00008_367477.trc) ORA-15558: replay thread encountered unexpected error
Replay client 1 finished (14:57:35)
You can then execute reports based on the replay_id found from the below query:
select id, name, status from dba_workload_replays;
The below shows the statistics from running your report which can be used to analyze the results. You’ll need to specify the replay id (in this case 1) that is returned when running the previous query.
set pagesize 0 long 30000000 longchunksize 2000
select dbms_workload_replay.report(replay_id => 1,format => 'TEXT') from dual;
or
spool replay_report_single_pdb.html
select dbms_workload_replay.report( <replay id>, 'HTML') from dual;
spool off
The below query can be run to generate an AWR report. You can use the dbms_workload_replay.report results to identify the appropriate fields to populate the below query:
select * from TABLE(DBMS_WORKLOAD_REPOSITORY.awr_diff_report_html(<dbid capture>,<instance id capture>,<begin snapshot capture>,<end snapshot capture>,<dbid replay>,<instance id replay>,<begin snapshot replay>,<end snapshot replay>));
As you can see, there are several steps and potential “gotchas” along the way depending on your configuration. My recommendation is to try a small workload and make sure it works as expected before tackling a larger or more resource intensive load. AEM can help your organization implement technologies such as Oracle RAT while ensuring best practices are followed along the way, so please reach out to learn more about our service offerings.